
What To Pack For A Backpacking Trip
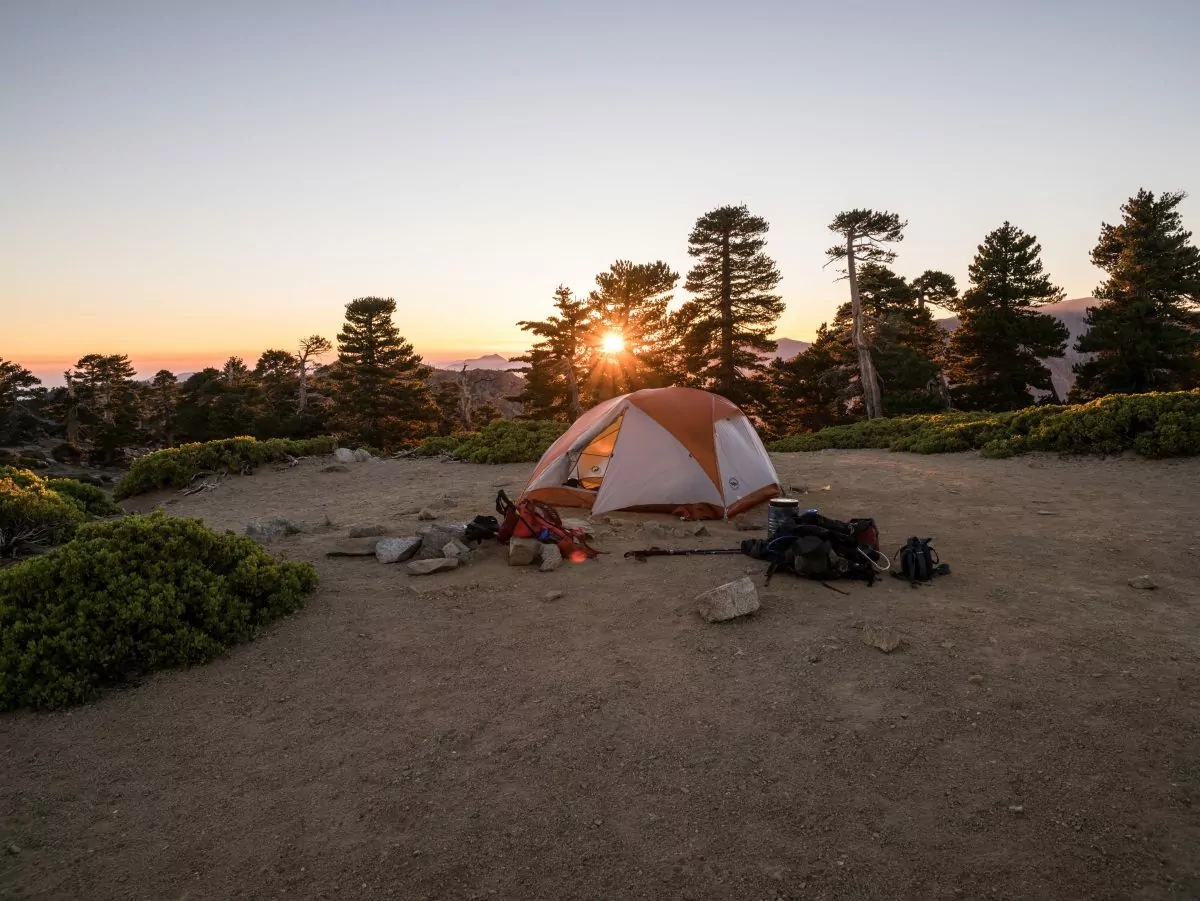
Photo by Tommy Lisbin on Unsplash
Backpacking is the ultimate outdoor activity; you get the opportunity to focus on your surroundings and enjoy a reprieve from everyday life. If you pack simply, you’ll get the chance to explore the outdoors with just the essentials. You might be wondering: what’s considered essential? Well, that depends on the length, duration, and location of your trip. But because backpacking requires you to carry everything on your back, it’s important to strike the balance between packing light and bringing the gear you’ll need.
Whether you’re a novice or a pro, deciding what to pack on your backpacking trip can feel like a daunting task. To help eliminate some of the guesswork, our blog team has compiled expert advice from our Wildland guides for a complete packing list (including our product recommendations). Hopefully, this backpacking packing list will get you prepared to hit the trail for your next adventure.
All Inclusive Backpacking Trips
Jump to:
1. Backpack
Let’s start off with the most important piece of gear for any backpacking trip: the backpack. There are hundreds of packs on the market today, which can make finding the right one a challenge. What works for your friend might not work for you, so don’t be afraid to try on different brands and styles. One major consideration? Pack capacity. Backpack capacities are listed in liters. Generally, a 50 – 70 L pack is great for a few days in the backcountry. But if you’re going on an extended trip, you may want to consider a 70 – 80 liter pack. If you think you’ll only go for overnight trips or you have super lightweight gear, you may be able to get away with a 40 L pack.
You will also want to ensure your backpack fits properly. Try on different sizes to find one that fits your torso length and waist circumference to prevent discomfort and injury. Head to your local gear store and they should be able to assist you with fitting your pack properly.
In general, you can choose between three different pack styles.
- Frameless: a lightweight pack that contours to your back, best for carrying light loads (10 pounds or less).
- Internal-Frame: a structured pack that allows you to carry heavier loads more comfortably; It shifts minimally because it sits flush against your back.
- External Frame: an old-school pack style that is considerably heavier but extremely adjustable and customizable. It allows you to evenly distribute weight so you can carry heavy loads for long distances.
Our Wildland Gear Guide has more recommendations for our favorite backpacking packs, as well as suggestions for choosing one.
Pack Cover
There’s nothing worse than all of your gear getting drenched in the rain. So, along with your backpack, you should pack some sort of waterproofing. A rain cover —a waterproof protector that covers the outside of your backpack and protects it from rainfall — is the most common choice. A rain cover can also protect your backpack from rips and tears when you’re hiking through narrow and overgrown trails. So even if you don’t plan to hike in the rain, a rain cover is still worth the money as it can extend the life of your backpack.
Some backpacks come with a rain cover included, but you can also purchase them separately. When you’re looking for a rain cover, make sure the liter capacity of the pack and the rain cover are the same. For example, this Osprey Large Rain Cover fits 50 – 70 liter packs, while the medium fits 30 – 50 L.
Some people opt for a pack liner instead of (or in addition to) a rain cover. This lightweight, waterproof bag acts as a buffer between your gear and your backpack, helping to keep everything in your bag dry. Most backpacks don’t come with a pack liner included, so if you purchase one separately, just make sure the size is compatible with your backpack. Some of our guides use a large, thick trash bag as a pack liner in addition to a rain cover.
Backpack Pack List
- Backpack
- Rain cover (optional, but recommended)
- Pack liner (optional)
2. Shelter
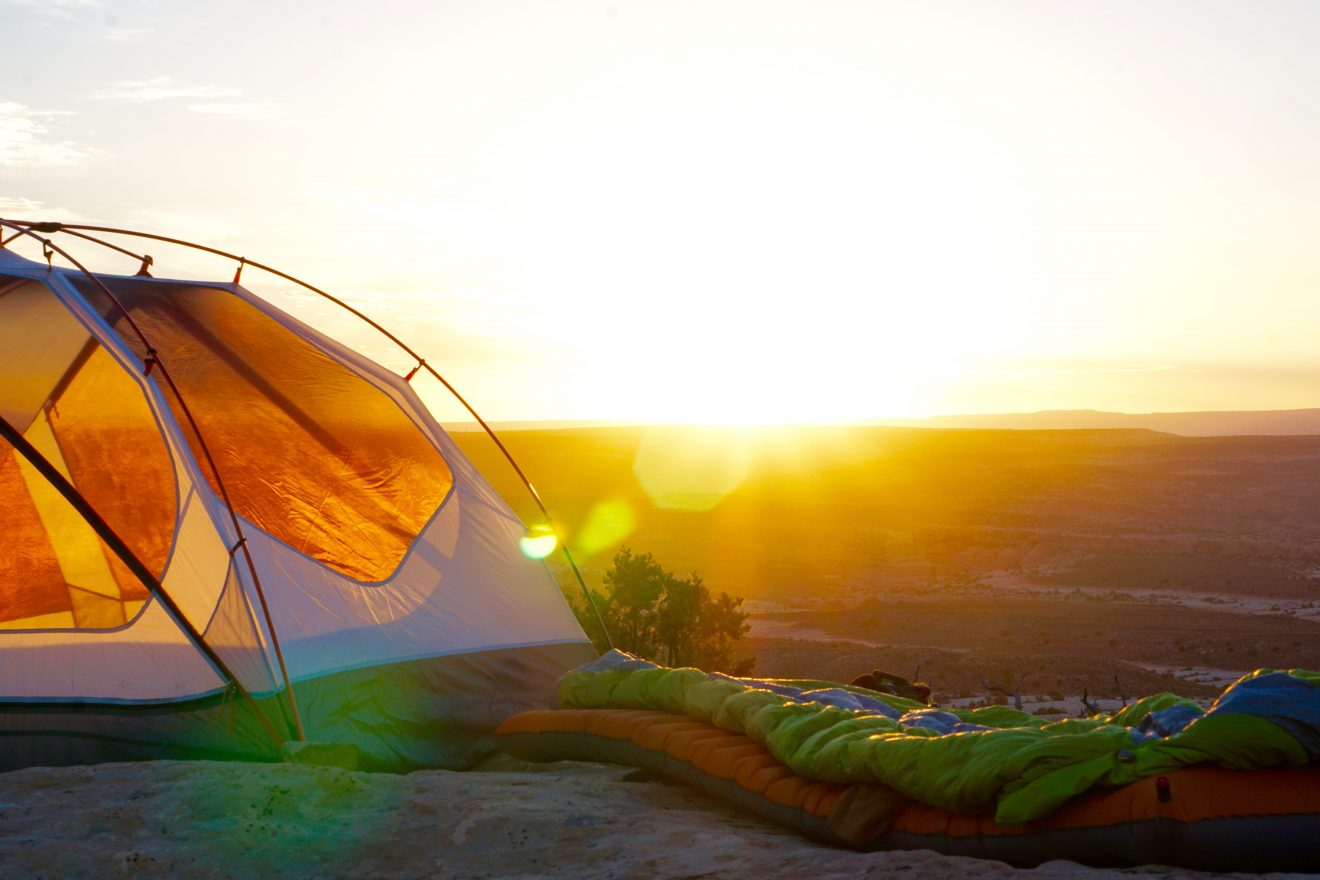
Photo by Jack Sloop on Unsplash
There’s nothing like sleeping under a sky full of sparkling stars, but a quality shelter helps keep you safe from elements like weather, bugs, and wildlife. Your shelter of choice will depend on personal preference and trip destination. We’ve outlined a few options below:
Tent
A tent is a go-to for most backpacking trips. If you’re planning to sleep in your tent alone, a single person tent will save weight, but if you plan to backpack with a friend, there are many lightweight, yet spacious, two-person tents out there to choose from. Tents also come in various forms, like single-walled vs double-walled tents. Again, this will depend on the type of trip you’re taking. We’ve outlined some of the basic differences below:
- Single-wall Tents, like the Zpacks Duplex
- Advantages: simplicity of set up and lighter weight
- Disadvantages: condensation, generally less roomy
- Best Uses: alpine areas that are cold and dry
- Double-wall Tent, like the Big Agnes Fly Creek HV UL2
- Advantages: multiple doors and vestibules, less interior condensation
- Disadvantages: heavier weight
- Best Uses: everyday backpacking, rainy and humid areas
In addition to your tent, you might also want to consider packing a footprint (or groundsheet). This lightweight sheet, which is the same size as your tent’s floor dimensions, lays on the ground beneath your tent and forms a barrier between your tent and the ground. It protects the tent from abrasive rocks, sand, gravel, and moisture. Footprints are often sold separately, but are worth the extra dollars as they can prolong the life of your tent.
Our Wildland Gear Guide has recommendations for our favorite backpacking tents, as well as considerations for buying your own.
Hammocks
If you’re camping in warmer or dryer climates, hammocks can also be a great sleeping option. Just be aware that they won’t provide the same privacy and protection as a tent. Kits like the Hennessy Hammock Ultralight or the Eno Junglelink provide ready-to-go sleep systems for backpackers.
- Advantages: you don’t need to find even or puddle-free ground, and you’ll get that “sleeping under the stars” vibe
- Disadvantages: not allowed for use everywhere and you need trees for set up
- Pro tip: Choose a hammock system that includes a rainfly, under-quilt, tree saver straps, and preferably a built-in bug net.
Shelters and Huts
On some trips, like along the Appalachian Trail, you can use existing shelters and huts instead of carrying your own gear. Just make sure you do research to ensure you’ll have a place to sleep!
- Advantages: protects from the elements, saves weight in pack as no tent is needed
- Disadvantages: lack of privacy, rodents are common, trail-dependent
- Pro tip: Carry an ultralight ground cloth to protect your sleeping pad when staying in shelters and huts.
Floorless Shelters/Tarps
Before outdoor gear brands manufactured fancy tents, backpackers used to sleep under a tarp to escape the elements. Now, brands replicate this simple shelter with products like the Tarptent or the Sea to Summit Escapist Tarp Shelter. This shelter style is not for the faint-of-heart, and we recommend it for experienced backpackers only.
- Advantages: lightweight, better rain fly, quick and easy to pack up in inclement weather
- Disadvantages: bugs, condensation, less airflow when rain fly used
Bivy Shelters
Bivy shelters are one-person sleep systems that are best for alpine environments or fragile ecosystems where you want to minimize impact. Bivy shelters are not tents — and there is no overhead space — it’s basically a glorified waterproof sack for your sleeping bag.
- Advantages: lightweight, portable, add insulation, waterproof and bug-proof
- Disadvantages: small and tight, condensation, reclining is the only position option inside the bivy
Shelter Packing List
Here’s what you’ll need to pack for shelter on your backpacking trip:
- Tent
- Rainfly
- Stakes
- Footprint/Groundsheet (optional, but recommended)
- Hammock (optional)
3. Sleep System
After logging long hours on the trail, a good night’s rest in the backcountry is crucial, but with inclement weather, noises, and other disturbances, it can feel hard to come by. Fortunately, you can achieve restful sleep with just the basics like a sleeping bag, pillow, and sleeping pad.
Sleeping Bag
A sleeping bag is a backpacking essential, but the number of choices can be overwhelming. When packing for your backpacking trip, you’ll want to pick one with a shape that suits your sleeping style (most come in the classic mummy shape) and with an adequate temperature rating for the season you’re camping in. If you have a sleeping bag that isn’t quite warm enough for your trip, you can add warmth with a sleeping bag liner. Also, you should consider whether you want down or synthetic:
Down Sleeping Bags
- Advantages: warmer, lighter weight, compact
- Disadvantages: expensive, does not work if wet
- Best environments: cold, dry climates
- Examples: NEMO Disco 15, Mountain Hardware Bishop Pass 0, Thermarest Hyperion 32
Synthetic Sleeping Bags
- Advantages: less expensive, work better when wet, durable
- Disadvantages: heavier
- Best environments: wet climates
- Examples: Marmot Trestles Elite Eco 20, Big Agnes Sidewinder 20, Sea to Summit Trailhead 30
Sleeping Bag vs Quilts
Recently, a lot of outdoor brands have been making quilts instead of sleeping bags. Here are some of the main pros and cons of the two.
Sleeping bags
- Advantages: limited air drafts, simple (requires no set-up), mummy hood keeps your head warm
- Disadvantages: heavier, zippers, restricted movement
Quilts
- Advantages: lighter, more versatile, take up less space, freedom of movement
- Disadvantages: not as warm as a sleeping bag, can be drafty, and may be hard to stay on your sleeping pad
- Examples: Thermarest Vesper Down 20, Sea to Summit Ember 35
Sleeping Pad
In addition to your sleeping bag, a sleeping pad is essential for a comfortable night’s rest in the backcountry. Not only does it provide added comfort, it also helps keep you warm by adding an extra layer of insulation between your sleeping bag and the ground. There are three main sleeping pads styles (air pad, self-insulating, and closed-cell foam), all of which have their benefits and drawbacks. Air pad and self-insulating pad tend to be the most comfortable, but closed-cell foam pads are the least expensive and most lightweight.
Closed-cell Foam sleeping pads
- Advantages: cheapest option, lightweight, durable, and provide excellent insulation
- Disadvantages: uncomfortable and too bulky to put inside of a pack
- Examples: NEMO Switchback
Inflatable sleeping pads
- Advantages: more compact, comfortable — especially for side sleepers
- Disadvantages: risk of puncture, must be inflated
- Examples: Thermarest NeoAir XLite, Sea to Summit Ultralight Insulated
Self-inflating sleeping pads
- Advantages: comfortable, reasonably compact, inflates automatically
- Disadvantages: slightly less compact and heavier than inflatable, risk of puncture
- Examples: REI Trailbreak Self-Inflating, Thermarest ProLite
Sleep System Packing List
Here’s what you’ll want to pack so you can land some quality shut-eye in the backcountry:
- Sleeping bag
- Sleeping pad
- Sleeping bag liner (optional)
- Quilt (optional, in place of a sleeping bag)
- Pillow (optional, but recommended)
4. Navigation
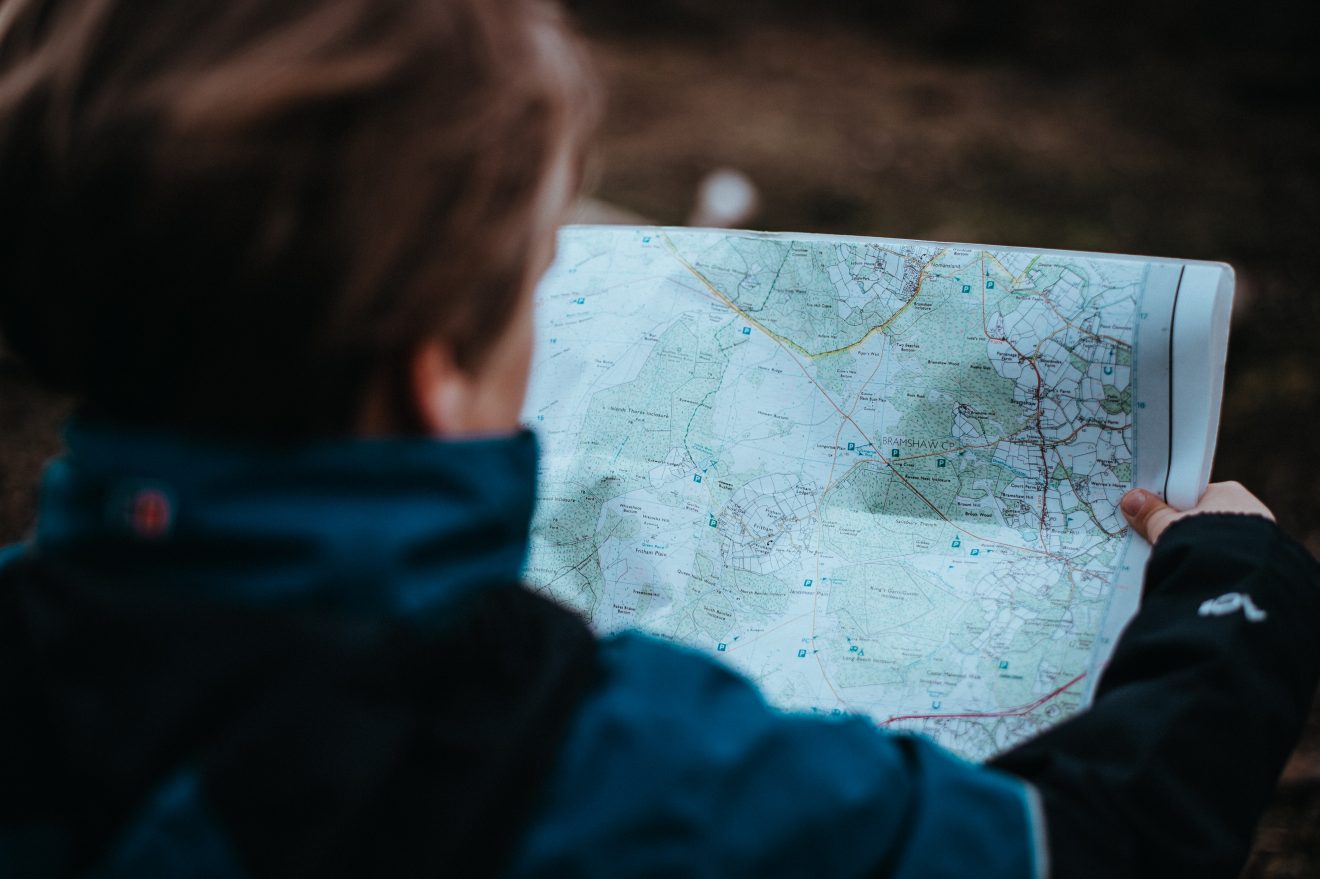
Photo by Annie Spratt on Unsplash
Even if you swear you know where you’re going, you should never head out on a trail without proper navigation. Trails can look different during different seasons, especially during inclement weather, so never just assume that you know the way. If you ever make a wrong turn (it happens!) or find yourself off the trail, you’ll be happy to have the resources you need to get back on track.
Navigation Packing List
Here’s what you’ll need to pack to stay on course while backpacking:
- Map
- Compass
- Cell phone with map apps like All Trails or Gaia GPS
- Backcountry permits
- Waterproof map bag (or ziploc)
- GPS (optional, but recommended)
- Watch (optional)
5. Camp Cookware
A reliable cooking system is crucial if you plan to cook during your backpacking trip. Fortunately, a basic setup can get you a long way in the backcountry, so don’t feel the need to load up your pack with every item from your kitchen!
Stove
A reliable stove is one of the backpacking cooking essentials and there are several options to choose from. Canister stoves are small, lightweight, and easy to light, which makes them great for backpacking trips. Liquid fuel stoves can offer greater stability, but tend to be heavier and costlier than canister stoves. Lastly, wood-burning stoves can be a good option for eco-conscious backpackers.
Canister stove
- Advantages: small, lightweight, easy to light, simmers, no fuel spills, good in cold weather and high elevation
- Disadvantages: limited pot size, guessing game on how much fuel you have left, higher fuel cost, wasteful (canister not refillable)
Liquid fuel (white gas) stove
- Advantages: more stable on uneven ground, easy to know exactly how much fuel you have remaining, refillable fuel canister, good performance in cold temperatures and high elevations
- Disadvantages: requires priming, requires cleaning, possible fuel spills, heavier than canister stoves, greater cost in initial investment
Wood burning stove
- Advantages: simple to use and lightweight
- Disadvantages: finding dry wood is difficult in wet environments, not allowed for use everywhere
Alcohol stove
- Advantages: inexpensive, quiet, and easy to find fuel
- Disadvantages: windscreen is necessary, longer time to boil water and more fuel required
Cookware Packing List
In addition to your stove, you’ll need to bring ample fuel, a backup lighting method, something to eat with, something to eat out of, and cleaning supplies. Here’s our list of backpacking cooking essentials:
- Camping stove
- Fuel
- Cooking pot (and additional pots and pans depending on your food & group size)
- Small lighter
- Box of wooden matches
- Small knife (optional, depending on the food you’re bringing)
- Eating utensil
- Lightweight cup or mug
- Biodegradable soap
- Small sponge
- Small trash bag or large ziploc
- Quick-dry towel
Food
There are many different routes you can take when it comes to backcountry food. Some prefer to pack premade, ready-to-eat meals like peanut butter and jelly, while others prefer dehydrated backpacking meals. No matter which option you choose, you’ll want to aim for 2,500 – 3,500 calories per person per day (or 1.5 to 2.5 pounds). Remember, you’ll be burning a lot of energy from hiking with the extra weight from your pack, so always bring more than you would typically need in a day – in addition to an extra day’s worth of food.
- Backpacking meals or premade meals
- Snacks
- Hydration tablets (optional, but recommended)
- Coffee or tea (optional)
- Extra day’s worth of food
- Bear canister or bear bag (depending on location)
6. Water Systems
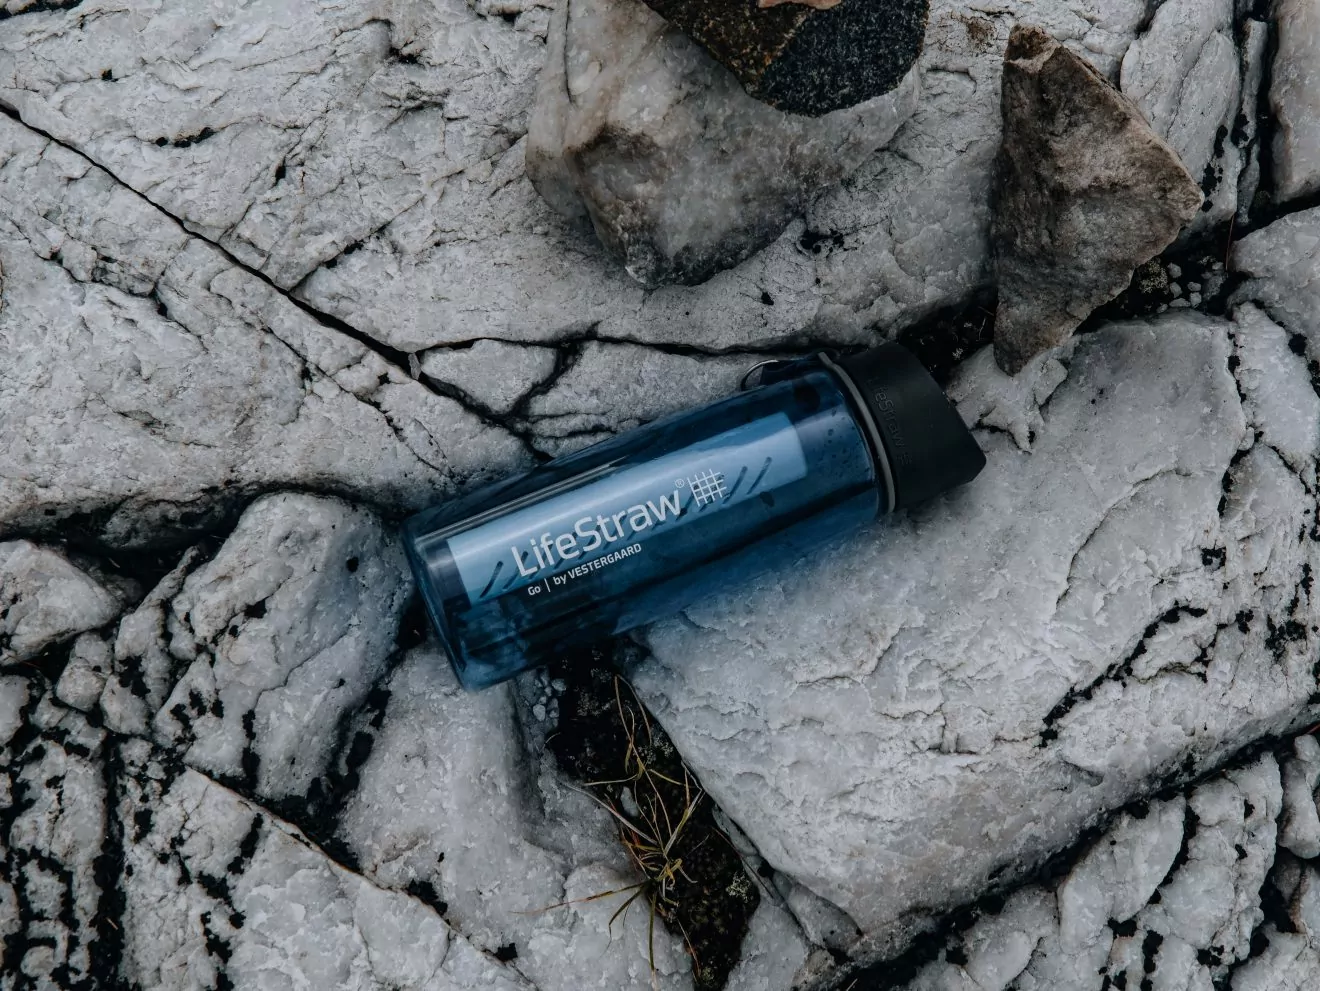
Photo by Manny Moreno on Unsplash
Water Treatment
Staying hydrated while hiking is crucial to preventing symptoms of dehydration and heat exhaustion. However, water quality while backpacking can be unpredictable, so a water treatment system is one of the most important items on a backpacking list.
When selecting a water treatment method, there are a few different options to consider. Water filters, like a squeeze filter, bottle filter, gravity filters, and straw-style filter, use physical filtration to remove harmful bacteria and protozoa, like E. Coli and Salmonella. Purifiers, on the other hand, like gravity purifiers, pump purifiers, and UV light purifiers, use chemicals, such as iodine, to treat the water and kill harmful bacteria and viruses.
Another option, which can be used as a standalone treatment or in tandem with any other method, is to boil the water for one to three minutes. This process can be time-intensive, but it results in water that is safe to drink and free of harmful bacteria and pathogens. No matter which option you choose, be sure to pack at least 1 liter of water at the start of your hike and scope out water sources on the map prior to heading out on the trail.
Water Packing List
- Water treatment system
- Water bottles or hydration reservoir (filled!)
7. Clothing
Having the proper gear and comfortable clothes can make all the difference between an enjoyable hike and a miserable one. When choosing clothes for your hike, go for moisture-wicking and quick-drying materials, like wool, polyester, and nylon, rather than materials that will hold onto moisture and sweat (i.e. cotton). One caveat: if you’re hiking in the desert heat where moisture retention is crucial, you’ll want to wear cotton.
Backpacking Clothing Packing List
Here’s a list you can check off when packing your clothes:
- Short sleeve shirt
- Long sleeve shirt
- Hiking pants
- Hat
- Underwear (1-2 pairs)
- Wool or synthetic socks (2-4 pairs)
- Sports bra
- Puffy jacket (down or synthetic)
- Gloves (optional but recommended for any trips with potential cold weather)
- Bandana or buff
- Baselayer bottom and top (optional, recommended for colder temperatures)
- Rain jacket
- Rain pants (optional, if heavy rain in the forecast)
- Hiking shoes or boots
- Camp shoes (optional but highly recommended)
8. Toiletries
Hygiene and self-care are still important in the backcountry, so don’t forget to pack your toiletries. This includes the basics, like a toothbrush and toothpaste, but also essentials like hand sanitizer, sunscreen and soap. A digging trowel is an especially important item so that you can leave no trace while doing your bathroom business outdoors. If you feel tempted to pack everything from your bathroom drawers, find a toiletry pouch (or a ziploc bag) that has just enough space for the essentials. That way you won’t end up carrying more than what you need.
Toiletry Packing List For Backpacking
Here are the toiletries you need for your backpacking trip:
- Toothbrush
- Toothpaste
- Biodegradable soap
- Hand sanitizer
- Toiletry pouch
- Sunscreen
- Chapstick with SPF
- Feminine products (like a Divacup)
- Bug repellant (optional)
- Digging trowel
- Toilet paper + dark sealable bag
9. First Aid
A First Aid Kit is an essential component of any backpacking trip and for good reason. Cuts, scrapes, bee stings, and headaches can all be a part of the backpacking experience, so you don’t want to leave home unprepared. Your kit doesn’t need to be overly extensive, but it should include the basics like wound coverings, antiseptic wipes, bandaids, ibuprofen, and medical tape. You can opt to put together your own kit, but pre-packed kits are compact and convenient.
- First Aid Kit
- Prescription medication (if necessary)
10. Miscellaneous
You’ve made it through most of the backpacking essentials, but there are still a few items you don’t want to leave home without. For one, a small amount of cash and your ID are good to have on hand in case of emergencies. A whistle is also helpful for alerting those nearby of danger. Finally, an extra small trash bag or large ziploc is good to have handy if you come across any trash on the trail. By doing so, you can do your part to leave outdoor spaces even better than you found them.
In order to save yourself from carrying excess weight, you’ll want to keep nonessential items to a minimum. But It can be nice to have something to unwind with after a long, hard day on the trail. So, if you find that you have the extra space, go ahead and pack a lightweight book, journal, or deck of cards.
- Trekking poles (optional but recommended)
- Headlamp (plus space batteries)
- Sunglasses
- Cash, ID, credit card
- Whistle
- Communication Device (optional)
- Small trash bag or large ziploc
- Drybag (optional)
- Power bank + cords (optional)
- Lantern (optional)
- Book (optional)
- Deck of cards (optional)
- Camera (optional)
- Notebook + pen (optional)
How to Pack Your Backpack
Photo by lucas Favre on Unsplash
So, now that you have all of your essentials, you might be wondering: how can I fit all of this into my backpack? Fortunately, there is a method to the madness. Follow these steps to ensure a comfortable, well-organized bag that will take you the distance.
First, take up some space. Lay out all of your gear so you can clearly see what you need to pack. Start by placing your soft lightweight items in the bottom of your pack. This includes things like your sleeping bag or quilt and inflatable sleeping pad (if you are using one). Here, they will provide comfort to your lower back and prevent the weight from resting too low. Once you get the big items in there, fill in the empty spaces (we promise there will be some!) with clothing layers you won’t need until camp.
Note: If you opted for a closed-cell foam camping pad, you can store that on the outside of your pack at the end of packing.
Next, layer on the heaviest items, which includes your tent, food, bear canister, and cooking kit. If you’re bringing a bear canister, place food inside to save space. Depending on the type of stove you’re bringing, you can put this in now or in one of your side pockets. Avoid putting fuel in the middle of your pack — if it leaks, this could be a trip-ruiner. Instead, you should put this somewhere separate, like a stretchy front pocket or side pocket.
At the top of your bag, right on top of the heaviest items, place the items that you might need during your hike. This includes your first aid kit, snacks, rain jacket, and water treatment. The smaller and accessory pockets along your backpack’s front, side, and hip belt pockets are great for storing smaller essentials that you need quick access to, like bug spray, snacks, water bottles, maps, and your rain cover.
Happy Trails!
So, now that you know what to pack on your backpacking trip, and how to pack it all, hopefully you feel a little more prepared to hit the trail. Just remember to check trail conditions, monitor weather forecasts, bring ample food and water, and to always leave no trace. Happy backpacking!
Wildland Trekking Hiking Adventures
As the world’s premier hiking and trekking company, Wildland believes in connecting people to fantastic environments in amazing ways. Wildland Trekking Company offers an array of incredible hiking and trekking experiences in 9 states and 11 countries. Read more about our world-class destinations.
To learn more about our guided backpacking trips and all of our award-winning hiking vacations, please visit our website or connect with one of our Adventure Consultants: 800-715-HIKE.

