
Top Five Summit Hikes in Washington State
Washington trails are amongst the best in the country. Heavy rainfall shapes the land, so hikers have to walk through lush forests, sub-alpine meadows, and past age-old glaciers to arrive at the summit of impressive mountains. The Cascade Range in Washington is harsh: hikers ascend steep slopes through dense forest understory, cross never-ending talus fields, and encounter snowfields at any time of year. The American Alps have a reputation for challenging even the strongest hiker, but for those looking to put in the effort, the rewards are unparalleled in the Lower 48. Many of the summits across Washington are accessible to hikers, and reaching the tops of these majestic mountains can be a life-changing experience. This list of summit hikes contains a range of adventures, from day hikes to overnight trips, with every mountaintop providing fresh views and unforgettable moments.
| Trip | Difficulty | Days | Miles |
| Burroughs Mountain, Mount Rainier National Park | Moderate | 1 | 9 |
| Trappers Peak, North Cascades National Park | Moderate | 1 | 10.2 |
| Mount St. Helens – Monitor Ridge Route, South Cascades | Strenuous | 1 | 10 |
| Navaho Peak, Snoqualmie Region/Teanaway | Moderate | 1-2 | 13.4 |
| Thunder Creek to Ruby Mountain, North Cascades National Park | Strenuous | 1-2 | 17 |
Guided Pacific Northwest Trekking Adventures
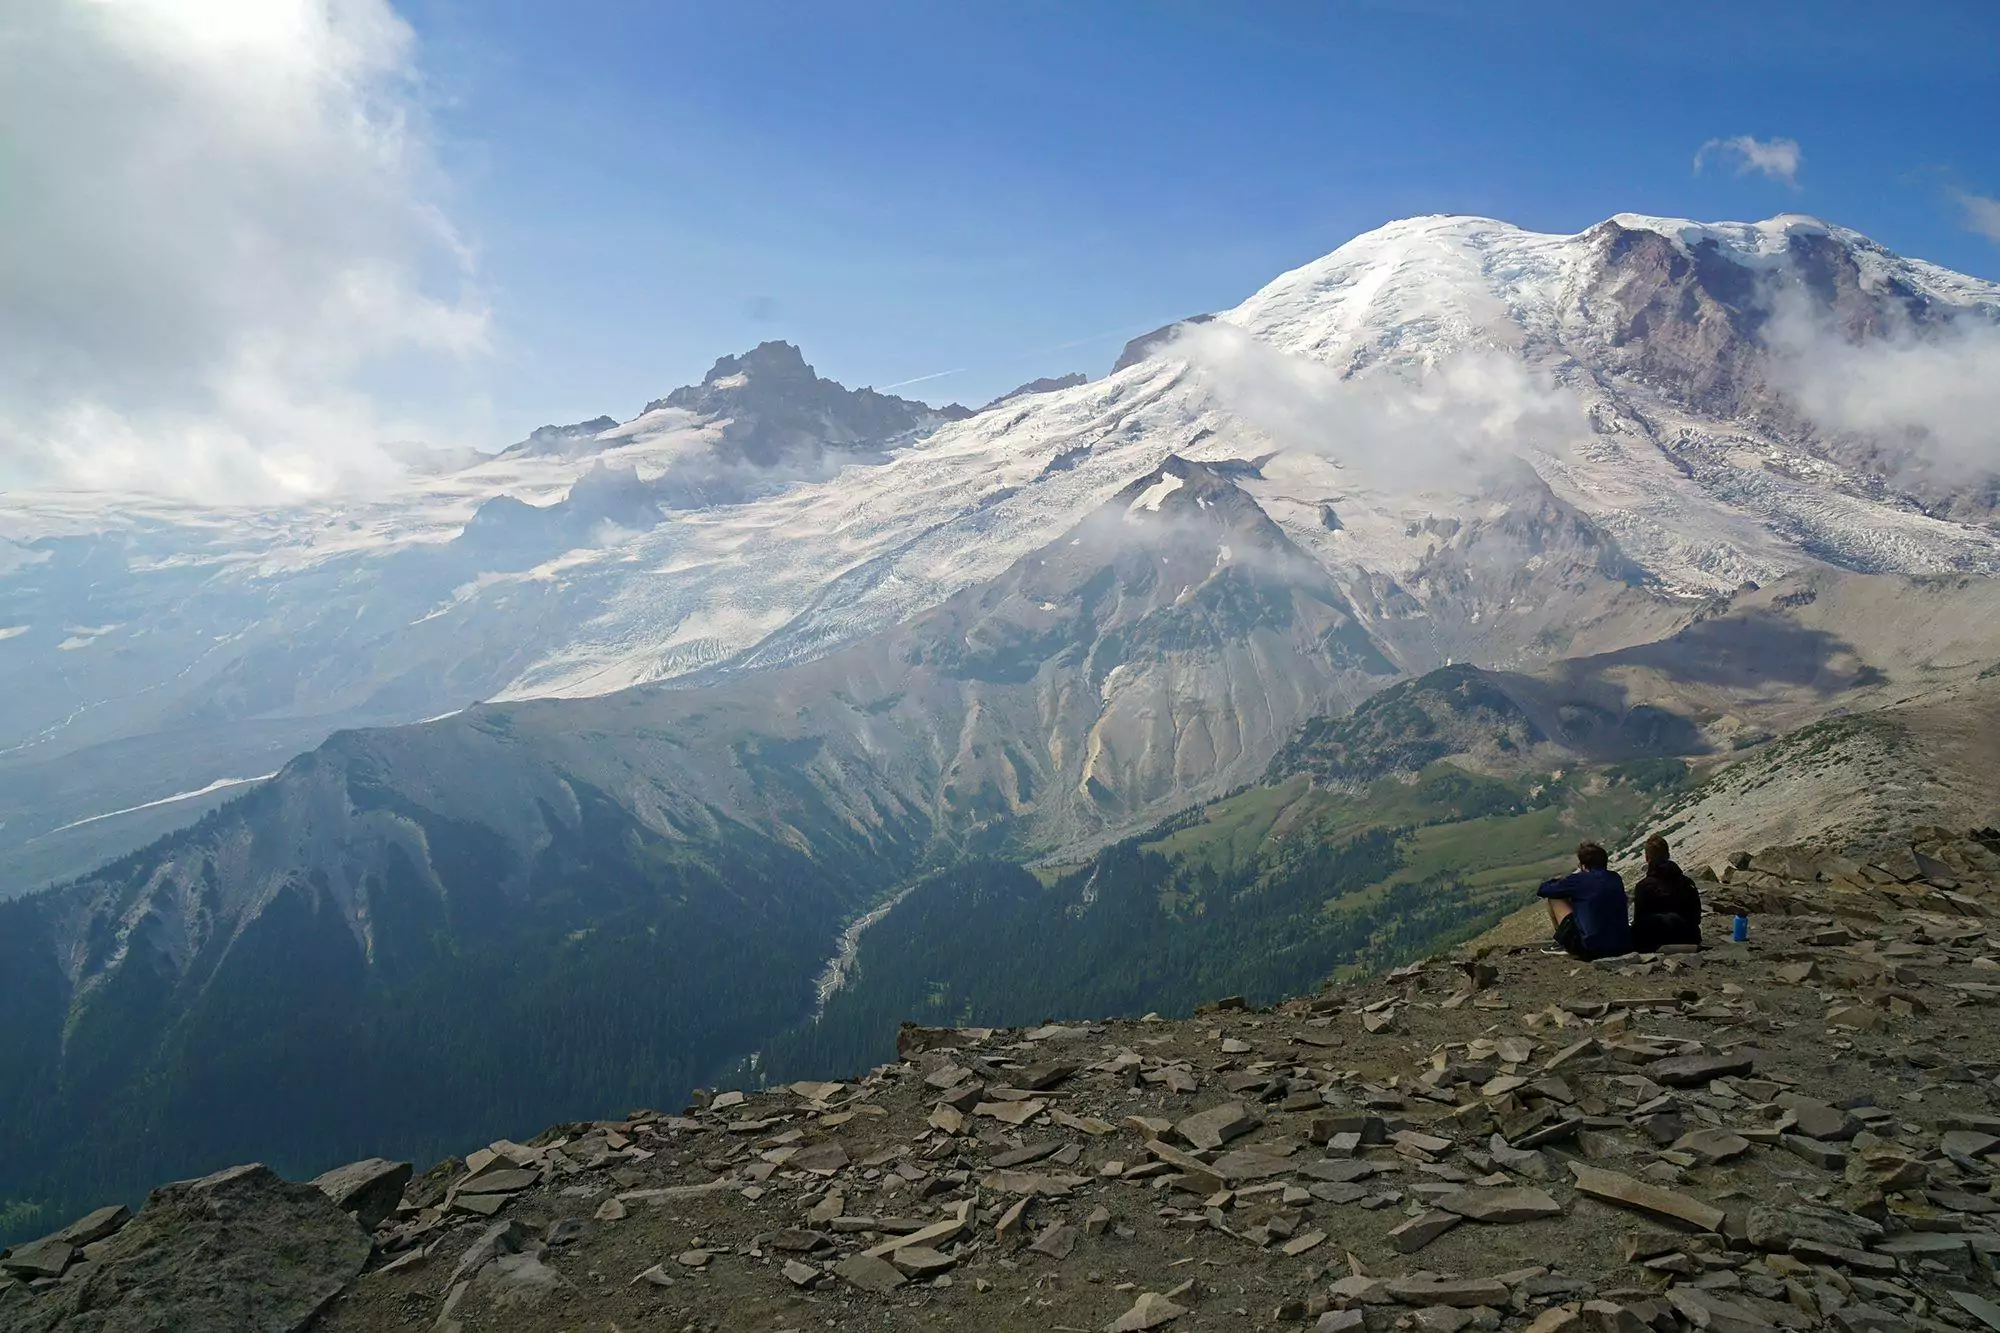
1. Burroughs Mountain, Mount Rainier National Park
Trail Overview
Burroughs Mountain, despite its name, is actually a series of three summits along a ridge on the northeast slope of Mount Rainier. Stare straight at massive glaciers as icy-blue crevasses hang on precipitously to Rainier’s rocky cliffs. This hike is customizable: choose the length of your route by hiking to the First Burroughs, Second Burroughs or Third Burroughs, and complete a loop by connecting a series of trails to hit new terrain on your return. Listen for the whistling alarm of marmots amongst the boulders, and watch for bright white mountain goats crossing scree slopes on the flanks of the volcano. If you hike to the Third Burroughs, this 9-mile roundtrip hike takes you through some of the most impressive tundra landscape in the continental United States.
Trail Details
Sunrise
The Burroughs Mountain Trail starts at the Sunrise Area of Mount Rainier National Park, which, at 6400 ft, is the highest point in the park reachable by vehicle. Start at the restrooms at Sunrise and follow a trail uphill towards Sourdough Ridge, turning left at the first junction you reach. Continue hiking for a little over a mile until you reach Frozen Lake. The views here are already fabulous: wildflowers line the trail and small mammals dart between rocks. Countless mountains, spanning from the local Cowlitz Chimneys to Glacier Peak in the Central Cascades, sprawl out in front of you. At the junction, the seemingly-barren tundra greets you. If you look closely, it is actually full of life. Alpine plants and animals learn to adapt to even the harshest of environments.
Burroughs Mountain Trail
Follow signage to continue on the Burroughs Mountain Trail. The First Burroughs is along the ridge at 7000′, while the Second Burroughs is less than half a mile down the trail sitting at 7400′. Take a break at Second Burroughs, where there is a wind barrier built up of stones. Gaze down into Glacier Basin below you, and out across the park to the north. Avoid the temptation to feed the squirrels, marmots, and chipmunks – human food is no good for wildlife.
Third Burroughs
If you still have energy left, continue downhill to the intersection with the Glacier Basin trail at the saddle. From here, it’s uphill to Third Burroughs at 7800′ where the astounding views of Emmons and Winthrop Glaciers will take your breath away. Mount Rainier appears so close you could almost reach out and touch it. As you stand at the Third Burroughs summit, you feel the force of the volcano as rocks and ice tumble down snowfields, and chilly winds sweep across the surface of the glaciers in front of you.
Turn around and hike the way you came to complete the trail. On your way back, walk along the Sunrise Rim Trail to make this a lollipop loop hike.
Permits, Fees, and Reservations
An entrance fee* of $30 per vehicle, or $15 per individual, is required to enter Mount Rainier National Park.
*The America the Beautiful National Park Pass would cover this entrance fee.
When to Hike
Mid-July through September. This hike sets out from the Sunrise region, which is the highest point accessible by vehicle in the park. The Sunrise Road generally opens in late June or early July and closes in late September or early October. Snow lingers late into the season, and you may encounter snowfields along the trail late into the summer. Check the road status and trail conditions before you plan to hike this trail.
Hike the Burroughs Mountain with A Guide
Guided Burroughs Mountain day hikes are available and are a stress-free, exciting way to hike this trail. The tour company handles gear, snacks, and lunch, and provides a professional, knowledgeable guide so you can focus 100% on enjoying your adventure. Read more…
All-inclusive Rainier Hiking Tours
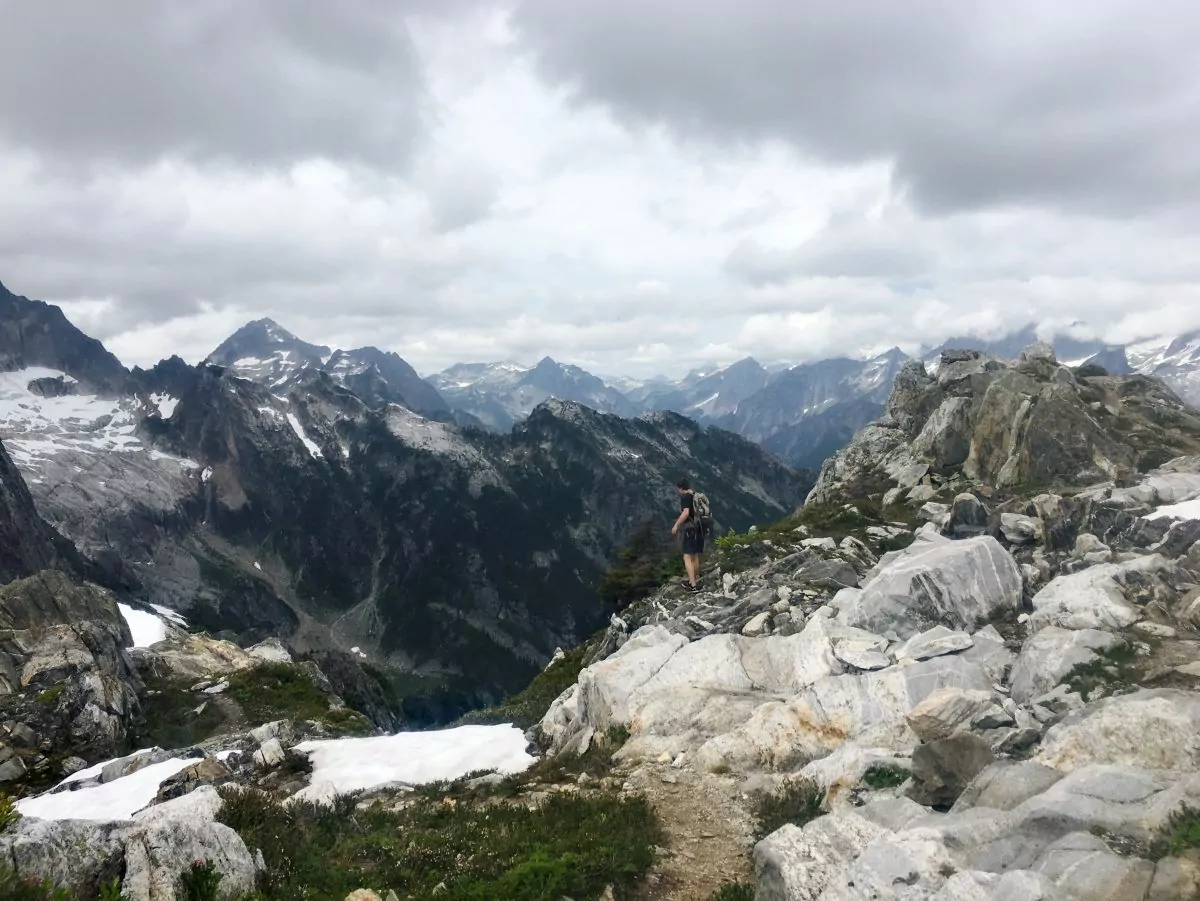
2. Trappers Peak, North Cascades National Park

Trail Overview
Trappers Peak, which rises impressively above the Thorton Lakes basin, is an outstanding summit hike in the middle of the North Cascades. It makes an exciting day hike or a pleasant overnight backpacking trip if you set up camp at Thorton Lakes. The ascent up Trappers Peak is relatively moderate by North Cascades standards but puts you amidst some of the most rugged mountains this country has to offer. The scrambly ridgeline approach to the summit boosts your adrenaline as glacially-carved cirques spread out below you. When you reach the top, the surrounding views will have you wishing the uphill section lasted a bit longer.
Trail Details
The Thorton Lakes trail begins along an old logging road that is now overgrown with thimbleberry, salmonberry, and sword ferns. Meander along this flat section as you cross flowing creeks and observe nurse logs providing nutrients to new growth. After two miles, the trail narrows as you head left and start your uphill trek. The classic North Cascade climb begins: roots and rocks litter your path as you switchback your way through the forest.
Eventually, around mile four, you reach a trail junction. If you’re heading to Thorton Lakes to set up camp, turn left and descend into the lake basin below you. Be careful: the trail to the lakes is steep and can be icy early in the season.
If you’re heading to Trappers Peak, continue right and uphill, skirting the ridge as views start to open up. Hike through subalpine meadows and reach an outstanding overlook of Mount Triumph and Thorton Lakes. Continue ascending, gaining 1000′ in the mile to the summit. Soon, you reach rocky terrain and may need to use your hands to assist you up and over small benches. The ridge becomes narrow and steep, but all sections with exciting exposure are along the main trail while you have two feet planted solidly on the ground.
When you reach the summit, Mount Triumph and the Picket Range dominate your view. Watch clouds roll over jagged peaks and pinnacles. Countless streams cascade from the terminus of glaciers and over slabs of granite to the valley floor thousands of feet below. These epic North Cascades scenes will be etched in your mind for years to come.
Permits, Fees, and Reservations
There is no entrance fee required to visit or day hike in North Cascades National Park. However, if you plan to camp at Thorton Lakes below Trappers Peak, obtain a backcountry permit from the Wilderness Information Center in Marblemount.
When to Hike
Much of the North Cascades remain covered in snow until mid-summer. Attempt this hike in mid-July through mid-September for optimal trail conditions.
All-inclusive North Cascades Backpacking Trips
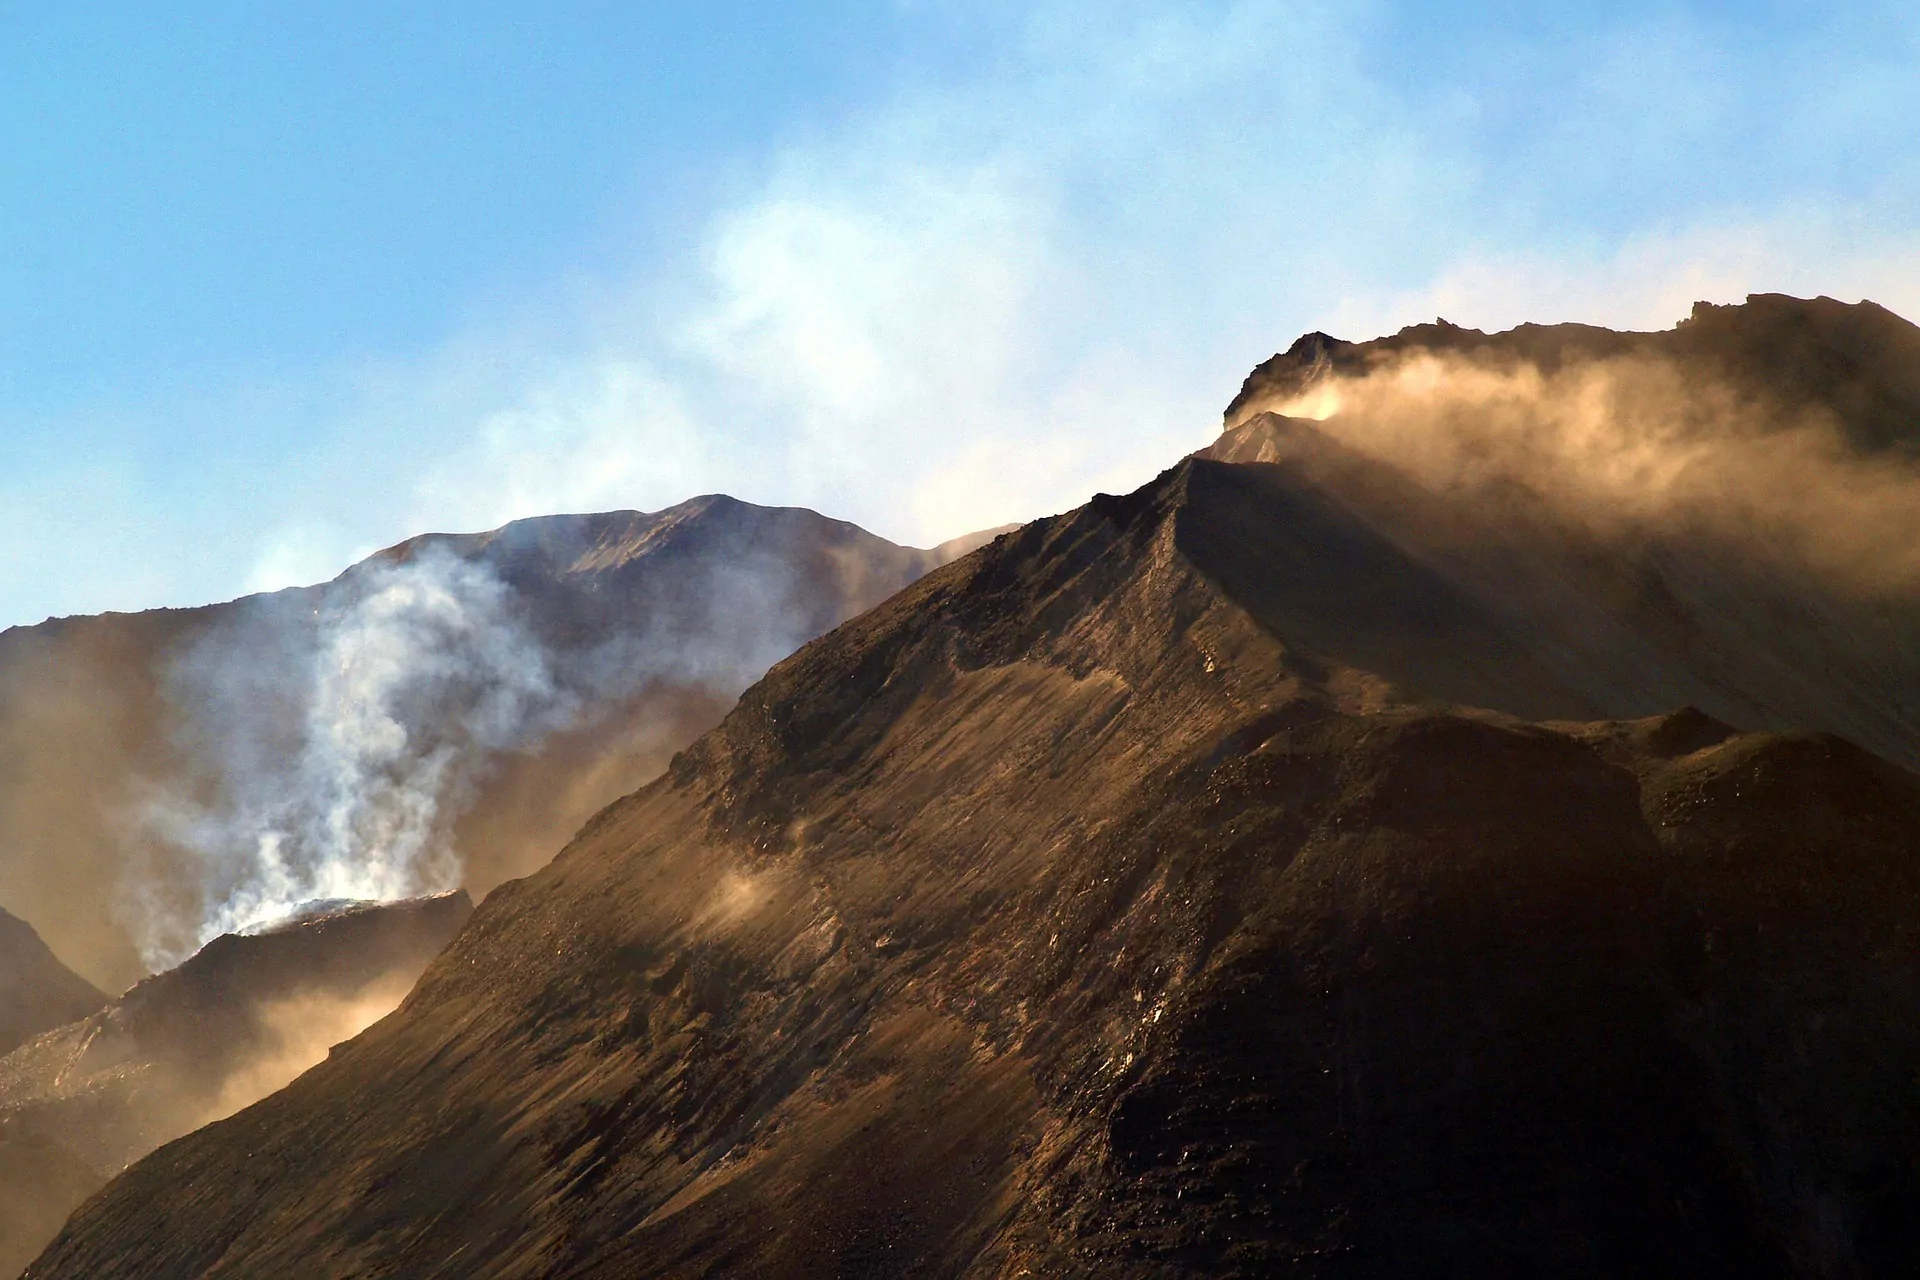
3. Mount St. Helens – Monitor Ridge Route, South Cascades
Trail Overview
In Southern Washington lies Mount St. Helens, a volcano infamous for its activity. It is the only one of five volcanoes in the state that requires no technical skills to reach the crater rim. But that doesn’t make this 10-mile roundtrip hike easy by any means. This is a brutal climb, requiring over 4000′ of elevation gain and miles of travel on loose, ashy, volcanic rock. The reward is worth the effort as you get the opportunity to see recent geologic history firsthand. This dynamic landscape is in flux: the lava dome atop Mount St. Helens has grown as the years pass since its eruption in 1980. A new glacier has since wrapped around the rocky crater rim and continues to advance. The Monitor Ridge route on Mount St Helens is one of the best summit hikes to get an up-close look at volcanic processes both past and present.
Trail Details
Monitor Ridge Route
Start at the Climbers’ Bivouac trailhead, at 3780′, and hike the first 2.1 miles along the Ptarmigan Trail. You will be steadily climbing through forests and meadows. Once you reach 4800′, a permit is required to hike any higher on Mount St. Helens. Trees become more sparse and boulders more plentiful as large wooden stakes begin to mark your route.
Once out of the forest and into the boulder field, the difficulty of the trail significantly increases. You gain 2500′ as you navigate through the dark rocks. This sharp volcanic pumice can scrape your body and work its way into your shoes, so gaiters and gloves can be helpful here. This section of the trail gets hot, so start your hike early to avoid too much sun exposure.
The last 1000′ slog to the summit can wear down even the most adept hiker. “Two steps forward, one step back” is often quoted by hikers as they fumble their way up the loose scree. Eventually, the slog is over, and you are standing atop the crater rim with never-ending views of Washington and Oregon, including Mount Rainier, Mount Adams, and Mount Hood.
Advice for the Trail
At the summit, be aware of cornices, which are unassuming snow masses that hang over precipitous cliffs. Make sure to stay clear of the edge by at least 10 – 15 feet when you are on snow!
When you are heading back down the trail early in the season, snow conditions for glissading (sliding down snow chutes) may exist. However, every year, numerous hikers are hurt while attempting to glissade. Stay within your ability levels and take your time getting down the trail.
Pro tip: Don’t forget sunglasses, sun coverage, and at least three liters of water. Almost the entirety of this trip is sun-exposed, so start early to escape the mid-day heat. Gaiters and trekking poles are essential, and leather gloves can be beneficial on the sharp rocky terrain.
Permits, Fees, and Reservations
Permits are required year-round for those planning to summit Mount St. Helens. You can reserve a permit through the Mount St. Helens Institute. Each permit is $15/climber with a $6 reservation fee per transaction. These permits are in high demand, especially for summer weekends, so reserve your permit well in advance. Those climbing between November 1 and March 31 can self-register at the trailhead.
You will need a Northwest Forest Service Pass or an Interagency Pass to park at the Climber’s Bivouac Trailhead. Day passes are also available at the trailhead for $5.
When to Hike
Mount St. Helens can be hiked year-round depending on the experience level of the climber. Hike the non-technical Monitor Ridge Route from summer through fall. Check trail conditions and snowpack.
If you attempt this climb from winter to early summer, bring crampons and an ice ax, and make sure to have proper self-arrest and avalanche training. Winter climbers should use an alternate route, such as the Worm Flows route.
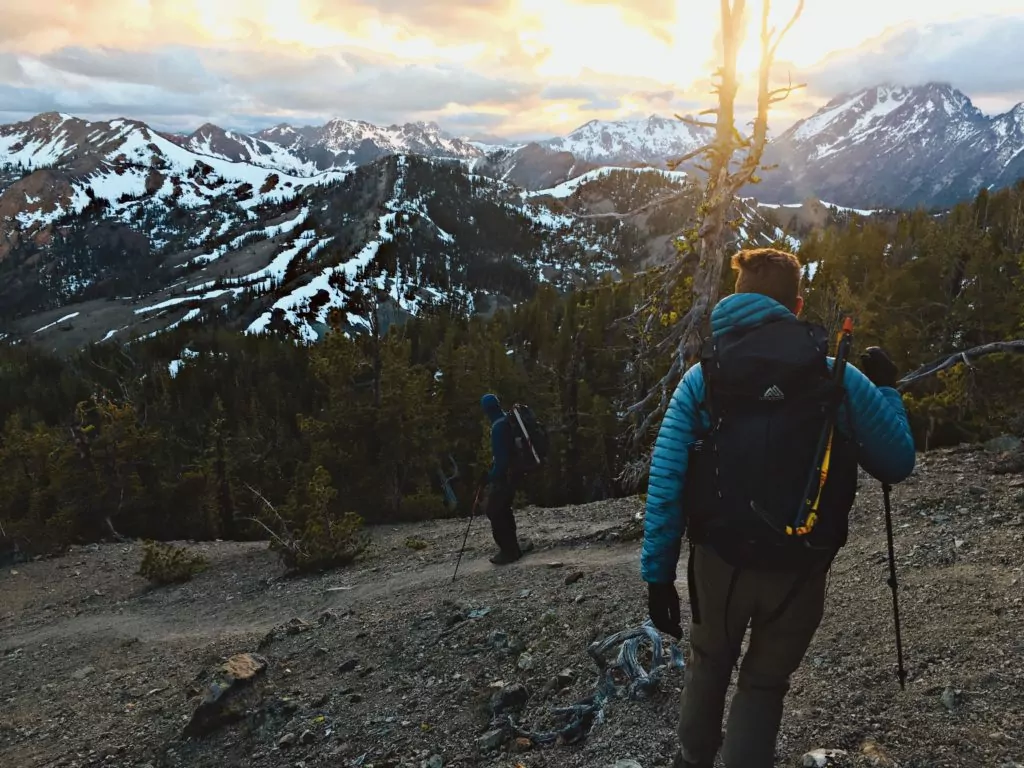
4. Navaho Peak, Snoqualmie Region – Teanaway
Trail Overview
Navaho Peak, on the eastern side of the Cascade Range, makes an excellent early season backpacking trip and summit hike. This trail, which is generally snow-free by June, lies in the Teanaway mountains, tucked back deep on a forest service road. Enjoyable hiking takes you to Navaho Pass along an enticing ridgeline with breathtaking views of the rugged peaks marking the Enchantments, which are covered in snow until much later in the season. Once atop the pass, a climber’s trail branches off to the right towards Navaho Peak. This steep climb is worth the effort: when you reach the small, blocky summit, the wind whips through your hair and cools your skin. If you time it just right, you can sit atop Navaho Peak as the sun dips low on the horizon and the last of the sunlight casts a warm glow on the mountain tops. Just don’t forget to pack a warm layer.
Trail Details
Navaho Pass Trail
Begin at the Stafford Creek Trailhead and follow the trail as it meanders along the creek for a couple of miles. In early summer, wildflowers create a rainbow of colors along the trail – from the vermillion hues of columbine to the scarlet of paintbrush, and the purples of shooting stars. Continue your gradual climb, through forests of douglas fir and ponderosa pine, for almost five miles until you reach meadows that serve as a backpacker’s camp. A creek runs through this meadow, making water more accessible here than elsewhere on the trail. Set up camp here, or fill up on H20 for the rest of your trip.
The trail skirts the meadow across from the campsites and heads uphill onto a barren, rocky plateau. Here, the pass sits a few hundred feet above you. Continue climbing to the pass, where views of the Enchantments/the Stuart Range expand beyond you. If you continue to the right along the pass, there are a couple of campsites with incredible views. Take note and come prepared: these sites get very windy, and there is no water atop the pass.
Navaho Peak
From the pass, it’s 1000′ in one mile up to the top of Navaho Peak. While not quite a scramble to the peak, this is a true climber’s trail with steep, loose rocks and dirt. Trekking poles and mindful footing can be helpful here. The small summit of Navaho Peak sits around 7200′ and hosts some of the best views of the Stuart Range, the Three Brothers, and Iron Mountain. Once you’ve taken in the awe-inspiring views, head back down the trail the way you came. For experienced hikers and scramblers, the ridgeline that connects Navaho Peak to Earl Peak offers ample opportunities to continue your exploration.
Permits, Fees, and Reservations
You will need a Northwest Forest Service Pass or an Interagency Pass to park at the trailhead. Self-register for a free backcountry permit at the trailhead if you plan on spending the night in the wilderness.
When to Hike
This trail is an excellent option for an early-season backpacking trip. Depending upon snow conditions, Navaho Pass and Peak can be hiked starting in mid-May through mid-October.
5. Thunder Creek to Ruby Mountain, North Cascades National Park
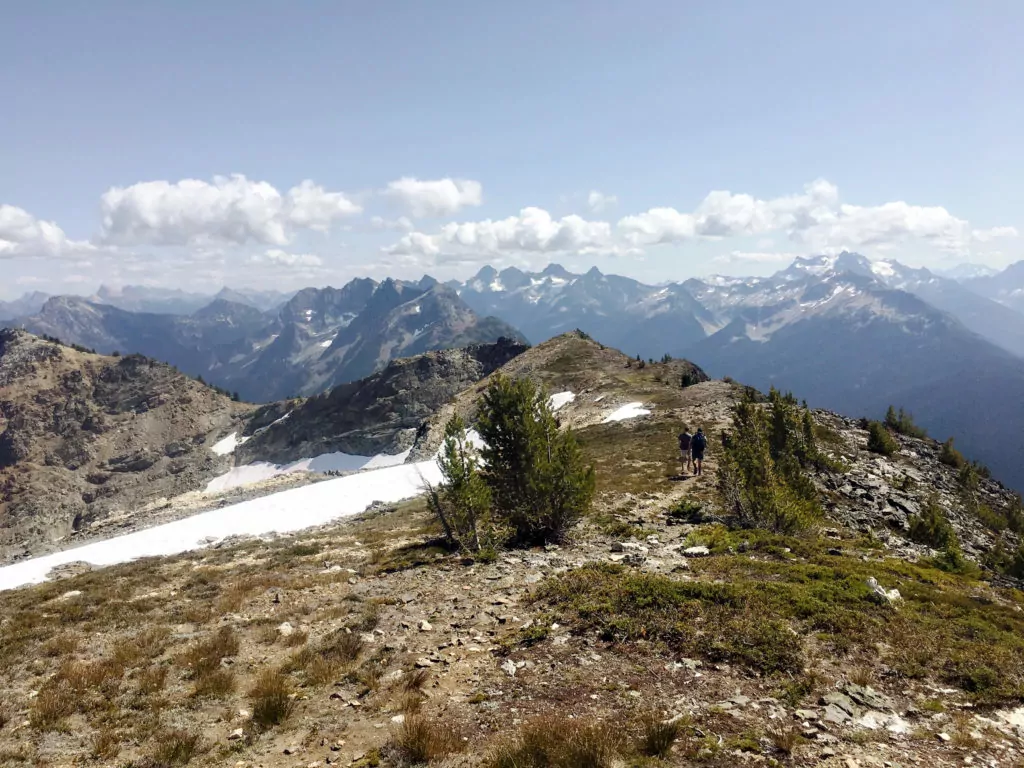
Trail Overview
Every time I reach a summit of a peak in the North Cascades range, my heart just about bursts. There’s something about the never-ending layers of snow-capped mountains that makes me want to fall to my knees. And at the top of Ruby Mountain, you’re in the middle of it all. Standing atop the summit after miles of trekking through lush forest and subalpine meadows, you feel the endless expanse of wilderness. This trail is best hiked as a multi-day trip, with a base camp at Fourth of July Pass, but the experienced hiker could complete this trail as one long day.
Trip Details
Thunder Woods
Start at the Thunder Creek Trailhead at the back of the Colonial Creek Campground. The icy blue water of Thunder Creek surges through the valley and into Diablo Lake, a region that was long ago shaped by glaciers. This water looks almost chalky, due to the glacier flour: rocks ground down by years of immense pressure bearing down under the weight of massive ice sheets. In Thunder Woods, moss clings to rocks, and decaying logs provide life to new growth.
Fourth of July Pass
A little under two miles in, a bridge spans Thunder Creek. Stop here to observe and watch the water flow under your feet. At mile two, you reach the junction with the Fourth of July Pass trail. Stay left to climb through forests of douglas fir and western cedar while vibrant green mats of moss carpet the forest floor. It’s a steep climb, but sections of flat bring ease after many switchbacks. Finally, as the trees start to shorten and the lichen drapes loosely over branches, you arrive at Fourth of July Pass camp. If you can, head left and wind past open sites until you reach a camp spot that has unobstructed views of Snowfield and Colonial Peaks and the Neve Glacier. With enough trees to provide shade, but sparse enough for catching an epic sunrise, this site is a real gem.
Ruby Mountain Trail
Set out from camp knowing you’re in for a long wooded uphill trek. Continue on the Fourth of July Pass trail, past the overlook for the Panther Potholes until you reach a trail on the left directly before a small wooden bridge. This trail hosts a sign that states “Trail Abandoned.” Don’t let this dissuade you: the path isn’t maintained, but it’s relatively straightforward for those with basic navigation skills. Enjoy the forest canopy for the first few miles as it shades your route. At about 5600′, the terrain changes. You feel as if you’re entering the alpine. Blueberry bushes line your path and trees are shorter – adapted to the windy, harsh environment of the flanks of Ruby Mountain.
Ruby Mountain Summit
There’s a great overlook at about 6000′, offering sweeping views of the Neve Glacier. From here, traverse the west side of the ridge, ambling through rocky alpine meadows sprinkled intermittently with wildflowers and talus fields. Eventually, the trail becomes less distinguished. At this point, you can see the ridge where you are heading. Head straight uphill, following cairns as the going gets tough. The footing gets looser, and rockfall is frequent, so be mindful of others in your hiking party below you.
Eventually, you gain the ridge and feel like you’re on top of the world. The sea of peaks that is the North Cascades spreads before you, and you’re smack in the middle of it. To the west are the ominous glacier-capped peaks of the Pickets with dark pinnacles and unwelcoming names (like Mount Despair and Mount Terror). To your east, the mountains get drier, and the rocks take on reddish hues. The eastern side of the range spans to Washington Pass and beyond.
While you marvel at the expanse, scramble up and over rocks as you follow a trail along the ridgeline. The actual summit lies along the ridge where the radio tower sits. Sign the summit register before returning the way you came.
Permits, Fees, and Reservations
Backcountry permits are required for all overnight trips into the North Cascades National Park. Secure a permit at the Wilderness Information Center in Marblemount. Reservations are not required, and walk-up permits are often available for this trail. However, if you wish you reserve a permit, submit reservations (and a $20 non-refundable application fee) for the summer season from March 15 – April 15.
When to Hike
This trail is best hiked in late-July through September. Snowpack lingers at high elevation until late in the summer. Wildflowers will peak between late-July and early August. Weather gets variable in September, so check conditions before setting out on the trail.
Explore North Cascades on a Guided Trip!
Guided Thunder Creek-Ruby Mountain backpacking trips are available and are a stress-free, exciting way to get into the wilderness. The tour company handles permits, gear, transportation, meals, and provides a professional guide so you can focus 100% on enjoying your adventure. Read more about North Cascades backpacking with Wildland…
Wildland Trekking Hiking Adventures
As the world’s premier hiking and trekking company, Wildland believes in connecting people to fantastic environments in amazing ways. Wildland Trekking Company offers an array of incredible hiking and trekking experiences in 9 states and 11 countries. Read more about our world-class destinations.
To learn more about our guided backpacking trips and all of our award-winning hiking vacations, please visit our website or connect with one of our Adventure Consultants: 800-715-HIKE.

