
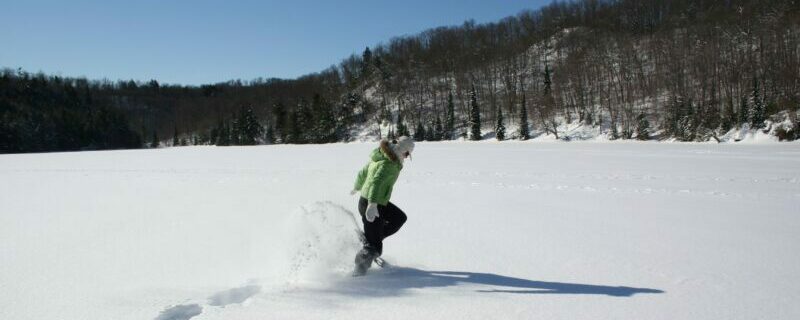
Planning A Winter Backpacking Trip
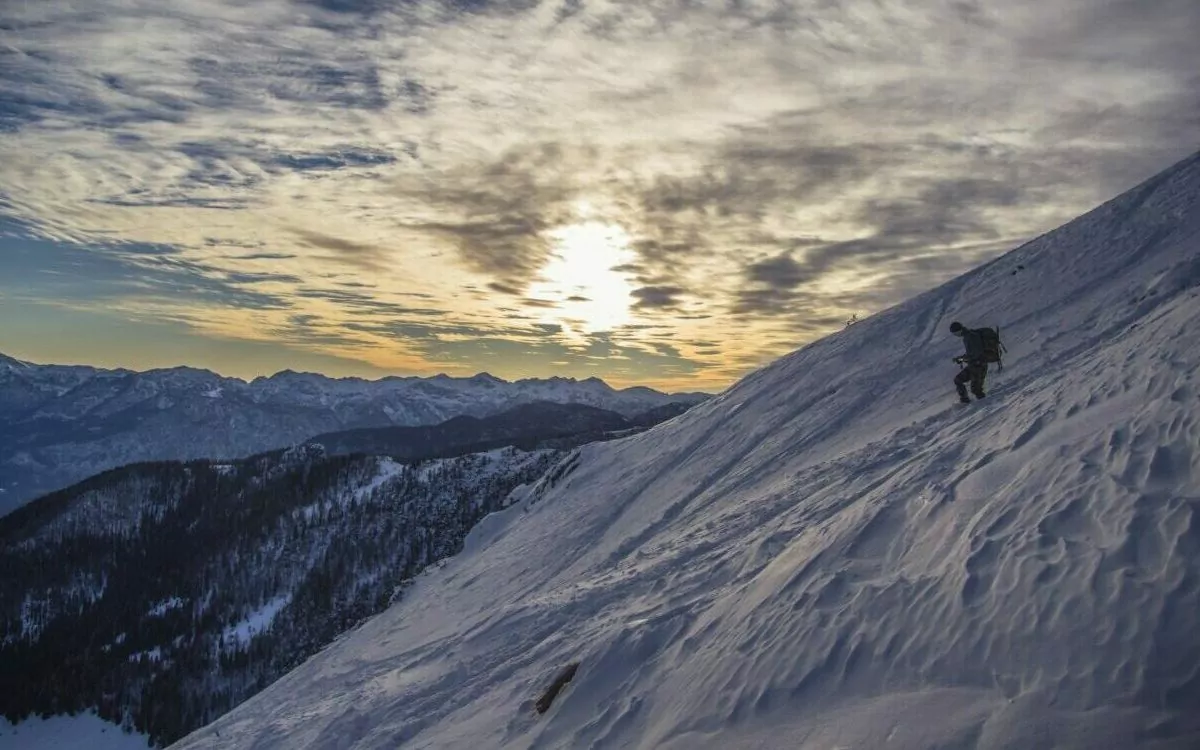
Most of us find trip planning to be a dreaded undertaking. Planning for a backpacking trip takes even more time and attention. Planning and packing for a winter backpacking trip can be a daunting task. Something left behind, like a toothbrush, is no big deal; however, having the correct gear in the winter is vital to your comfort and could literally save your life.
By following the ten easy steps outlined below, you will be packed, organized, and ready to set out on your winter backpacking adventure. You can rest easy knowing that you have taken the necessary steps needed to be safe while playing in a wooded winter wonderland.
Award Winning Winter Hiking Adventures
1. Choose a Winter Backpacking Trail
Choosing the correct trail is critical for a successful winter backpacking trip. For your first trip, pick one of your favorite short hikes. A short hike is a blessing if anything happens to go awry on your trip. Pick a hike with a sunny campsite, preferably a campsite that will be greeted by the morning sun. Choose a trail with a campsite near open water for drinking and cooking so that melting snow or ice will not be necessary. A campsite with plenty of downed wood is an added bonus because campfires are a blessing on cold winter nights and early mornings. Be sure to avoid hikes with stream crossings, swamps, or areas prone to flooding when choosing your winter backpacking trail. Also, avoid walking onto frozen lakes. Falling through the ice would surely dampen your trip.
My first winter backpacking trip was an overnight trip in February. We picked a 5-mile hike to a campsite near a river. The campsite was big and beautiful. It had running water for drinking and cooking. The site had plenty of wood for a cozy fire. Everything was perfect; however, as darkness fell and we climbed into our tents, we became colder and colder. Our gear was not up to the task. At 5am in the morning, we quickly packed up our campsite and high-stepped the 5-miles back to our heated car. We were truly grateful that we had chosen a short hike for our first winter trip.
2. Become Avalanche Educated
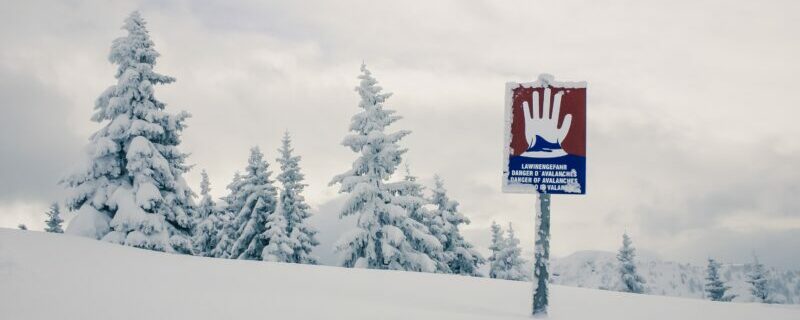
The Great Smoky Mountains are my backyard playground. When I am out playing in the Smokies, I do not worry about an avalanche occurring. However, when I am visiting Colorado and snowshoeing and cross-country skiing in the Rockies, avalanches are a real possibility. It is important and vital to your safety to become educated about avalanches. Do your best to keep your winter backpacking trip free of avalanche danger by taking an avalanche awareness class. These classes teach:
- How avalanches work.
- Needed gear and its uses when trekking into areas where an avalanche might occur.
- Available avalanche resources to help guide you in making decisions.
- Understanding avalanche forecasts and how to use this information to guide your decision-making.
- How to avoid avalanche terrain.
- Recognition of avalanche conditions.
- How to stay out of harms way.
- How to implement avalanche rescue techniques.
Avalanche.org offers a variety of courses and is an excellent resource for learning about avalanche awareness. The Utah Avalanche Center is another terrific resource offering a free on-line avalanche awareness course. For learners who prefer holding a book in their hands, Snow Sense; A Guide to Evaluating Snow Avalanche Hazard by Jill Fredston and Doug Fessler is highly recommended. Whatever method you choose, please become avalanche aware if your winter backpacking trip takes you to an area with the possibility of avalanches.
Yellowstone Ski & Snowshoe Tours
3. Develop Trip Itinerary and Acquire Permits

Step one: Acquire the appropriate map of the area for your desired trail. Grab your beverage of choice, a writing utensil, and paper. Get comfy and start planning. Plan out your route with daily mileage and desired campsites. This information will not only be needed to acquire permits but will also help in determining your caloric needs once you begin food planning.
Step two: Acquire a permit from the local ranger station if needed. To acquire a permit, the following information is often needed:
- Start date
- End date
- Location of each nightly campsite
- An emergency exit plan often required
4. Emergency Exit Plan

Unfortunately, emergencies in the wilderness do happen. Preparation is the key to quick and effective evacuations. While studying your trail maps and developing your itinerary, make note of the quickest routes to a fire road or highway along your path. Also, make a list of emergency response numbers for the area you will be hiking. The emergency 911 number does not always work in wilderness areas. Ask the forest ranger station in the area of your hike for these emergency contact numbers. Keep both lists in your first aid kit.
In the event of an emergency, you will be able to grab your lists and quickly make necessary calls if cell service is available and determine your fastest exit.
Another step in emergency preparation is sharing your itinerary with a responsible and reliable friend or family member. This person needs to stay cool headed in emergencies. Give your emergency contact the date and time of your return. Provide this designated person with the ranger station’s phone number where you acquired your permit. Have your emergency contact notify the ranger station if you do not return or make contact by the agreed-upon date and time.
After making your emergency plan, replenish your first aid kit or put together a first aid kit if you don’t already have one. If you have time, consider taking a Wilderness First Aid class and Wilderness Survival Skills Level 1 class. These classes teach you how to remain calm, think outside “the box”, and be successful in emergencies when your resources are limited.
All-inclusive Desert Winter Hiking Experiences
5. Don’t Get Stranded

Plan out how you are getting to the trailhead and how you are returning home. Is a friend picking you up upon completion of your hike? Are you hiring a shuttle driver? Or are you setting your own shuttle by leaving a car at each end of the trail?
One easy way to find a shuttle driver is by contacting a local outfitter store in the trail’s area. Shuttles vary in price. Some are free, but tips are expected. Some have a set rate based on mileage. Others charge a per person rate. Do call multiple shuttle drivers to compare rates. Do not hesitate to negotiate rates, and please do tip your shuttle driver – especially if driver is on time, makes extra stops, and has a clean vehicle.
When planning your winter hike, be sure to check for road closings and plan alternative routes to the trailhead and home due to these closures. Roads may close because of ice and snow. The main road (441) through the Great Smoky Mountain National Park will often close for a few days here and there in the winter due to ice, snow and wind.
6. How to Build a Snow Camp
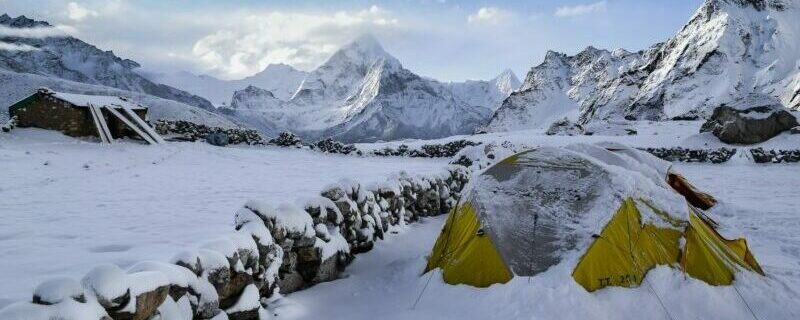
Making camp in the snow requires a few extra steps and campsite preparation. It is best to arrive at your campsite a few hours before sunset because these steps are easier to perform in daylight.
Step 1: Choosing the appropriate winter campsite
- Choose a spot that is sheltered from the wind.
- If possible, pick a site with running, non-frozen water.
- Evaluate for widow makers (dead or frozen braches that can fall on you from above).
- Set up camp for the sun to provide early morning warmth.
- Pick out a few landmarks to help identify the location of camp in the snow.
Step 2: Setting up your tent
- Stay warm by removing all damp clothing and putting on your dry camp layers, including a warm hat and dry gloves. Don’t forget to change into dry socks.
- Pack down the snow or dig out a campsite in an area slightly larger than your tent.
- Build a wind wall if a natural wind wall is not available.
- Set up your tent, using tent stakes designed for snow.
- Be sure to keep anything with a sharp edge away from the tent. These items include crampons, ice axes, and hiking spikes.
Step 3: Secure your camp (You don’t want to lose your gear under the snow.)
- Keep your trekking poles, skis, and snowshoes upright in the snow.
- Make sure everything is put away after use so you know exactly where everything is located.
7. Winter Camping Gear

Winter gear is a must when backpacking in the winter. Sadly, this gear is considerably heavier than the gear needed for a summer trip. Plan on a pack weight of 30-40 pounds for a winter trek. Here are a few things to look for and consider when purchasing the extra gear needed for a winter backcountry adventure.
Backpack
A larger backpack will be necessary to carry the extra gear needed for a winter excursion. For weekend adventures, choose an ultra-light 65-liter backpack with lash points for snowshoes, ice axes, etc. Line your pack with a non-scented trash compactor bag or a dry bag to keep everything inside dry.
Tent
A 4-season tent will keep you warmer in the winter. Preferably, use or purchase a 4-season freestanding, dome shaped tent. This design will be easy to set up in the snow and will also shed snow as it falls. The perfect tent also has extra guy lines for stability in strong winds and a large vestibule for cooking and storing items. Some experts suggest sizing up in tent size. This allows you the ability to bring your gear inside your tent with you, but be sure to leave sharp items outside.
Sleeping Bag
A good night’s sleep is vital to one’s health and happiness. As with my trip, lying in a tent and freezing all night can end a weekend in the woods early. Make sure you have the correct sleeping bag for your expected conditions, and climb into this perfect bag in dry clothes. Choose a sleeping bag that is rated at least 10 degrees colder than the forecasted lows. If you are concerned about being too cold, bring a sleeping bag liner as an extra layer of warmth. Most winter rated bags are hooded; however, down hoods are available if your bag is not hooded or you prefer using a quilt.
Down is warmer than synthetic as long as it stays dry. Down is also lighter weight for the equivalent temperature value when compared to synthetic. But if there is real risk of your sleeping bag getting wet in the winter, choose to bring a synthetic sleeping bag or quilt on your winter backpacking trip.
Sleeping Pads
Sleeping pads are a must in the winter. The correct pad will help keep you warm at night. Your sleeping pad should have an R-value of 5 or 6 for winter camping. The higher the R-value, the warmer you will sleep. For the best results, use an inflatable, insulated pad and a closed cell foam pad. Place the foam pad on your tent floor next to the ground; place your rain gear on top of the foam pad; and then place your comfy inflated pad on top, making a ground pad sandwich with your rain gear as the “meat.”
Also, use your foam pad when sitting on the ground while cooking, eating, or resting. Not only will this add a little comfort and luxury to your day but will also help keep you warmer.
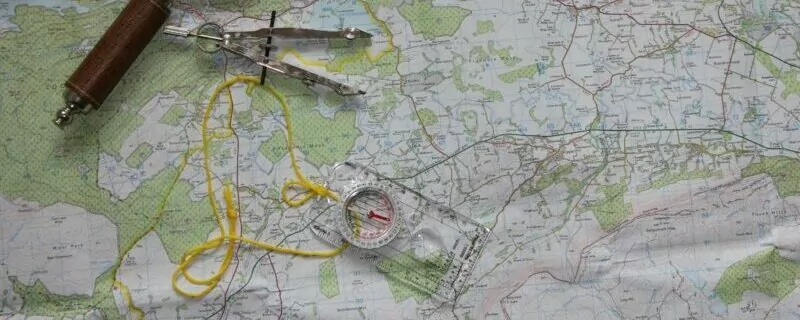
Navigation
Pack a paper map. Cold temperatures drain batteries; however, lithium batteries do perform well in cold weather. Therefore, don’t solely rely on your cell phone for navigation when taking a winter trip. Take a compass; be sure you know how to use it. For added safety, carry a personal location device that allows for easier location and quicker rescue in an emergency.
Cooking System
Having the correct stove is important in winter conditions. Some stoves and fuel perform better in cold temperatures and at higher elevations. I do not recommend cold soaking for winter hikes. Hot meals are needed to help warm the body and to keep up morale on really cold days and nights.
White gas stoves are best for winter cooking. White gas burns hot. It also burns clean and performs well in below-freezing temperatures. These stoves are heavier. Boil times are slower. Priming is often necessary when using a white gas stove.
I do recommend carrying a backup stove on your winter trip. Either carry a duplicate white gas stove or carry an alcohol stove. If using an alcohol stove, be sure to have a good windscreen to maximize heat output. These stoves also need priming. Don’t rely on alcohol stoves for melting large amounts of snow for your water intake. Alcohol stoves work best with small pots and pans.
Do carry extra fuel in the winter. Heat times are longer, and you may need to melt snow for water. Store your fuel in water to prevent freezing. Keep it in your tent with you at night. Avoid bringing butane and canister stoves on your winter backpacking trip because they perform poorly in cold temperatures.
Remember to pack the following items when putting together your cook system:
- Lighter, igniter, or waterproof matches
- Mug and/or pot
- Long handled spoon or spork
- Small sponge
- Paper towels in a Ziploc bag (for wiping out pot before washing)
- Large Ziplocs for trash
- Environmentally friendly unscented soap
Water Purification System
Clean water is essential for a successful backpacking trip. A filter system, like the Sawyer Squeeze, works well and is easy to use. However, if it freezes, filter systems become ineffective. Sleep with your filter and carry it in your pocket near your body on days when the temperature is below freezing.
Another option for clean water is using water purification drops or tablets. The downside to drops and tablets is that this method alters the taste of the water. I recommend carrying drops or tablets for backup use if your filter fails or freezes.
For winter backpacking, I recommend using insulated water bottles over hydration bottles. Insulated bottles will slow the freezing process. Stow these bottles upside down. Water freezes from the top down, so stowing your water upside down on subfreezing days will offer more sips of water before it is completely frozen. Of course, keep your water in your tent with you at night. It is warmer in the tent than outside.
If melting snow is your only option for water, follow the simple steps below:
- Gather clean snow
- Light stove
- Add snow plus a touch of water
- Add more snow as it melts
Toiletries
You will need the same toiletries on your winter backpacking trip as any other backpacking excursion with the addition of one item – the pee bottle. Yes, make your life easier and pee inside your tent on those cold, winter nights. Be sure to screw the top on tightly and place the now warm filled bottle at the bottom of your sleeping bag to warm your toes.
Here is a list of toiletries to help aid in packing:
- Hand sanitizer
- Toothpaste
- Small toothbrush
- Dental floss (can also use as thread for repairs)
- Pre-moistened wipes (for nightly wipe-off)
- 4 sheets of toilet paper per person/per day
- Menstruation products with empty Ziploc for waste
- Trowel
- Women’s Pee Rag and funnel
- Pee bottle
- Prescription medications
Bits and Bobs
When packing for any trip, it is easy to forget the little things. The list below will hopefully help everything end up in your pack. There are a few extra items added to this list specific for winter trips.
- Extra headlamp batteries
- Headlamp
- Sunscreen (Sunburns are a real possibility when hiking on reflective snow.)
- Lip balm (Cold weather and dehydration leads to chapped lips.)
- Sunglasses (Snow is bright; snow blindness is a real thing.)
- Tall Gaiters – (They help keep snow out of the top of your winter boots.)
- Ice traction devices: crampons or spikes
- Ice axe (if needed)
- Fire starting kit and a backup kit
- Small amount of cash
- Credit card
- ID
- Keys (to your car)
- Duct tape
- Needle
- Air mattress patches (if needed)
- Portable charger and charging cord (optional)
- Journal and pen (optional)
- Camera (optional)
- Trekking poles with snow baskets- (The baskets keep your poles from sinking in the snow.)
- Shovel (It is necessary when trekking in avalanche terrain.)
- Avalanche Beacon and Probe – (They are a necessity in avalanche terrain.)
- Snowshoes or cross-country skis
- Two disposable shower caps (The explanation for these items are in the “Dress for success” section of this article.)
- Emergency blanket
8. Dress for Success
Layers, layers, and more layers are what you will need for a successful winter backpacking trip. “Be Bold and Start Cold” is the winter backpacking motto. Your goal is to stay warm but not to sweat. Start your hike a tad underdressed for the weather. If you do not warm up after a few minutes of hiking, then add a layer. If you start sweating, take off a layer. When you stop for breaks, immediately add a layer that will trap your warmth, preventing you from rapidly cooling.
Base Layer
Purchase a good pair of mid-weight base layers, also called long johns. Your base layers will be worn next to your skin. You can choose either polyester or wool but definitely avoid cotton. Cotton will not dry quickly, especially in humid climates. Wet cotton will ultimately make you cold, potentially leading to hypothermia. Wool is more expensive than polyester. Wool is warm when wet and doesn’t smell horrid after multiple days of wear. Polyester dries fast and will also keep you warm when wet, but it retains smells even after washing.
Middle Layer
Your next layer is your insulating layer. Choose fleece pants, heavyweight long underwear bottoms, or a fleece-lined pair of hiking pants to keep your legs warm. A good puffy (down) jacket is all you will need to keep your core warm; however, a fleece sweater is also a good option. The advantages of a puffy jacket or puffy pullover are down is lightweight compared to fleece and more compressible, making it easier to pack in your backpack on warmer days. I do recommend a hooded puffy. Having the extra head covering option is always nice on that extra cold day.
Outer Layer
Your final layer is your waterproof and windproof layer. Your waterproof/windproof jacket and pants (rain gear) should be breathable. Pick rain pants with leg zippers. These zippers will allow you to take on and off your pants without taking off your boots. Jackets with pit-zips are an added bonus for quick cooling when you start to sweat.
waterproof Shoes
Winter trekking requires waterproof winter boots to keep your toes dry and toasty warm. Make sure you can wiggle your toes in your boots. Tight fitting boots restrict blood flow, causing circulation issues leading to cold feet that may result in frostbite. Keep your boots in your tent at night. Carry two shower caps in your backpack. Place a shower cap over the soles of each boot before bringing your wet boots in your tent. This trick will help keep your tent clean and dry inside.
Socks
If you’re going to overpack any item, make it this one. Dry socks are essential for a successful winter backpacking trip and for frostbite prevention. Wool socks are your best option. Pack a clean, dry pair to wear each day of your trip, a back-up pair for each day of your trip, and a fluffy warm pair dedicated for sleeping. Change into dry socks immediately if they become wet. The early signs and symptoms of frostbite are as follows:
- Cold and pale skin
- Numbness, tingling, or pins and needle sensation
- Clumsiness and stiffness in the affected area
Gloves
Insulated gloves with waterproof and breathable shells are a must for winter backpacking trips. Ski gloves work well while you are moving, but mittens are a better choice when sitting in camp. Mittens are excellent for keeping your fingers warm; however, you will sacrifice a bit of dexterity. Like with your hiking boots, make sure your gloves fit loosely and pack a few extra pairs. Change your gloves immediately if they become wet. Pack a few hand warmers in your backpack to slide into your mittens for those days when you just can’t keep your hands warm.
Hat
Even though it has been disproven that we lose half our body heat from an uncovered head, a hat is your best friend on winter trips in the woods. Any warm wool or synthetic hat will work, but make sure your hat covers your ears. Carry a balaclava or wool buff for covering your face on those brutally cold days. Your hiking hat may be damp after a day of hiking, so bring an extra hat for wearing in camp. If your sleeping bag doesn’t have a hood, bring a down cap for wearing in camp and for sleeping.
Camp clothing
Staying dry and warm is essential when on a winter adventure in the woods. It is easier to stay warm than to rewarm, so pack a dedicated set of dry and warm clothes for wearing in camp and sleeping. Down booties are added luxuries when relaxing at camp.
9. Calories, Calories, Calories!
Eating is important on any backpacking trip; but in the winter, eating literally keeps you warm on your winter trek. Your body generates heat as it digests food. Your body also increases your metabolism in the winter in an attempt to keep you warm. An increased metabolism equals increased calorie burn; hence, you need to eat more. Ingesting calories alone doesn’t keep you warm. You must also be hydrated because hydration is needed for proper food digestion.
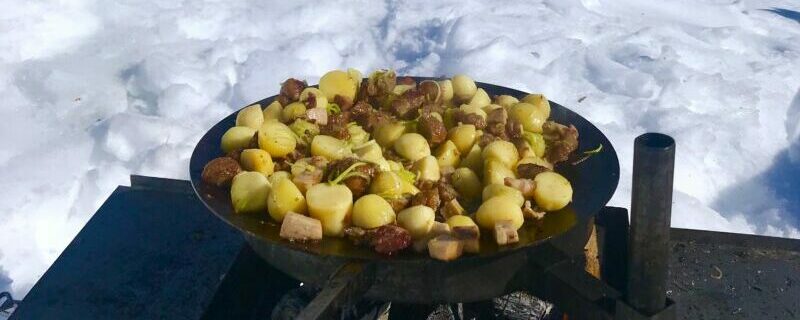
Plan high-calorie meals and eat often. Butter is your buddy. Add butter to everything – including your hot chocolate and coffee. Many hikers prefer not to stop for a hot lunch on winter days; they just prefer to snack hourly. Choose foods that you can eat with your gloves on like trail mixes, nutrition bars, and nuts. When planning your hot meals, choose simple, one-pot breakfasts and dinners. Avoid carrying foods that can freeze or solidify like fresh fruit and peanut butter.
Depending on the area you are hiking, bears may still be active in the winter. Be bear aware and use safe bear practices. Please hang your food bags or use bear canisters to keep the bears safe.
If you are interested in more details on food planning, check out my article: 10 Easy Steps to Planning a One Week Thru-Hike.
10. Tips and Tricks

As with any activity, the more you do it, the easier it becomes. Here are a few tips and tricks to make your winter backpacking trip an epic adventure:
- Use your body and sleeping bag as a dryer: Place your damp items in your sleeping bag to dry them while you sleep. However, if these damp items are making you colder, immediately remove them from your bag.
- Move before climbing into bed: Perform some jumping jacks, jog in place, or do the crazy eights warm up exercise before crawling into bed. Get your heart pumping and your body warm; but whatever you do, don’t sweat!
- Make a hot water bottle to snuggle with: Fill a water bottle with hot water. Make sure the lid is on tight and place it in your sleeping bag. It is like having a heating pad on your camping trip.
- Bring tent activities: It gets dark early in the winter, so you may find yourself awake and not ready to sleep. A deck of cards for playing games, a journal for writing, or a good book for reading can help pass the hours of those long nights.
- Don’t let winter weather keep you indoors: Brave the brisk air and fluffy white snow. Set out on a grand winter adventure. Winter backpacking is a doable and fun activity. Just be prepared. Check and recheck weather forecasts before you go. Pack the proper gear. Learn about hypothermia and frostbite prevention. Remember to stay dry, and don’t let anyone get chilled. Be proactive in your decision-making. It is never a bad idea to call off a trip if things appear to becoming unsafe.
However, if you still find planning for a winter backpacking trip overwhelming, never fear! Simply check out Wildland Trekking and choose the guided backpacking trip of your dreams. Wildland Trekking’s guided backpacking trips are a stress-free and exciting way to explore the backcountry. The tour company handles permits, gear, transportation, meals, and all the extra little details so you can focus 100% on enjoying your adventure. Read more…
Wildland Trekking Hiking Adventures
As the world’s premier hiking and trekking company, Wildland believes in connecting people to fantastic environments in amazing ways. Wildland Trekking Company offers an array of incredible hiking and trekking experiences in 9 states and 11 countries. Read more about our world-class destinations.
To learn more about our guided backpacking trips and all of our award-winning hiking vacations, please visit our website or connect with one of our Adventure Consultants: 800-715-HIKE.

