
5 Tips for Camping in the Snow

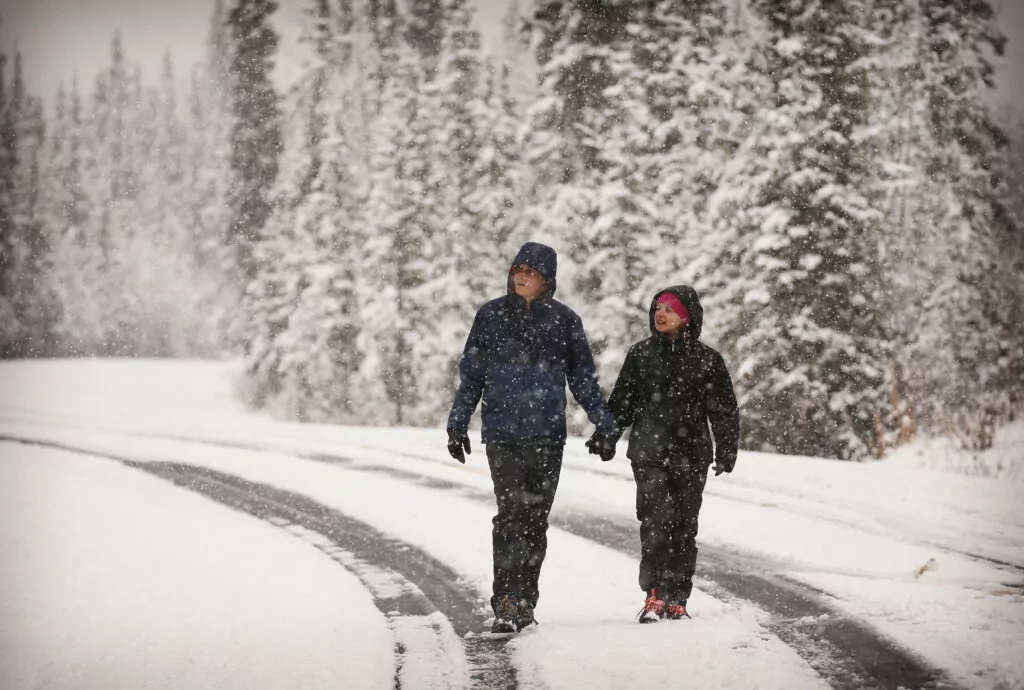
Many people will write off outdoor pursuits once temperatures start to drop. The thought of shivering in lieu of sleeping is enough to deter an otherwise avid camper. While it is certainly true that a winter camping trip takes a bit more effort and planning, sleeping in the snow can be both beautiful and rewarding if you properly prepare. With these five tips, you will stay warm and have a great time camping in the snow!
Guided Winter Hiking Adventures
Tip #1: Sleep Smart
The difference between a wonderful winter wonderland and a frozen nightmare is usually nothing more than a good night’s sleep. To achieve the feat, you need appropriate winter sleeping gear, and you need to know how to use it properly. Stay warm and enjoy the bliss of cozying up for a night of restful sleep with snow falling around you.
Gear Selection
The first step in securing success is in your pre-trip preparation. Having the right gear for the snow is essential in keeping you both comfortable and safe.
Sleeping Bag
If you know the average low temperatures of your region (which you definitely should know before heading out), you can find the right bag. Companies will display a “temperate rating” on the sleeping bag, or its tag or stuff sack. Men’s sleeping bags will typically use a Lower Limit Rating, which is the lowest temperature at which a “warm sleeper” will be comfortable sleeping with this bag. Women’s sleeping bags utilize a Comfort Limit, the lowest temperature at which a “cold sleeper” will feel comfortable in this bag. The difference simply means that because women statistically sleep colder than men, women’s bags are more insulated to achieve the same temperature rating as their male counterparts.
Look for a bag that is 10-20º lower than your trip’s anticipated low. For example, let’s say you are planning a Yosemite Valley backpacking trip in early spring with forecast lows of 30ºF. You will actually want your temperature rating to be between 10-20ºF. Your experience with a sleeping bag may vary depending on dozens of additional factors, such as your sleeping mat, base layers, shelter, and food consumption.
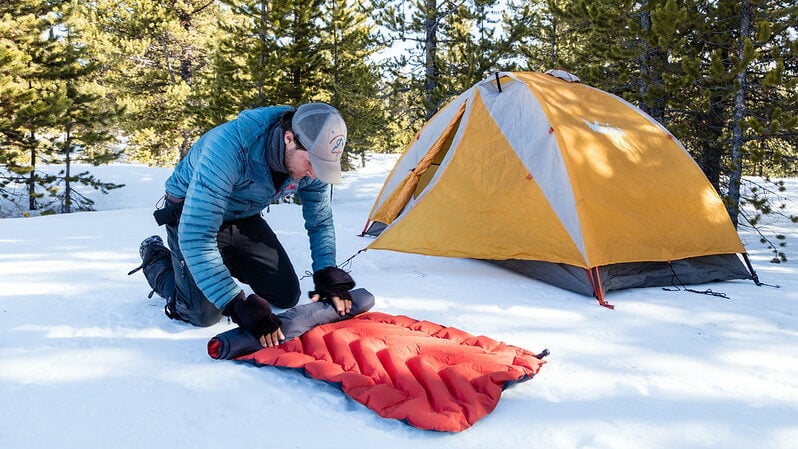
Sleeping Mat
Not all sleeping mats are created equal, particularly when it comes to preventing your buns from freezing. Even if your bag is warm enough, you can still get cold from the ground below if you don’t have a proper barrier from the snow. The measurement that indicates the mat’s ability to insulate you and resist heat transfer is called the R-value. The higher the R-value, the warmer you’ll be.
Generally, an R-value of 2-5 is standard for 3-season weather, but for snow camping, an R-value of 5 or more is appropriate. An inflatable mat will be warmer than foam; there are even down-filled inflatable mats on the market specifically designed for the winter wanderer. For even more insulation, add a foam mat underneath your inflatable. This extra mat will also come in handy to sit on while cooking, hanging out around camp, or putting on ski boots.
Shelter
Sleep Like A Pro
Sleeping in a sleeping bag is a pretty straightforward task, but here are a few tips to keep in mind when tucking in for the night.
Zip and Cover
Your precious warmth will escape out of any cracks in the bag so fully zip up and cinch the hood around your face. You can use a buff or face mask to cover your cheeks and eyes that would otherwise be exposed to the chilly air.
Sleep Wear
Make sure you always change out of your day clothes and into your sleepwear. There’s a lot of debate as to how many layers is too many when it comes to sleeping. In general, it’s a safe bet to start with your thermal base layers, thick sleep socks, beanie, and (if needed) a fleece jacket. Have a few more layers handy in case you need them. Avoid putting on too many layers straight away though. If you get too hot while you’re sleeping, you will start to sweat, which will ultimately make you colder.
Fill Empty Space
Empty space inside your sleeping bag becomes cold spots. When you start to feel chilly, use any extra layers you have to fill them up. Save yourself from having to put on an ice-cold shirt in the morning by using your day clothes to fill the spaces. If your bag is too long, it is imperative to stuff layers at your feet. If you still have cold feet, wrap a down jacket around them and lower legs. Even empty space on your tent floor can drop the temperature inside of the tent. Bring in your backpack and spread out your gear to help with this, just leave any sharp objects, like ice axes, outside.
Utilize Your Warmth
Most cell phone batteries cannot survive even one night on a cold tent floor. Keep your phone inside your sleeping bag with you and you will find that your battery will hardly lose power overnight. I prefer to keep mine either in a jacket pocket or down by my feet. This battery saving tip also holds true for satellite phones, GPS units, and smartwatches. Certain cartridge water filters, like the Sawyer Squeeze, become ineffective if they freeze. If you are carrying one in the snow, it’s a good idea to throw it down by your feet as you sleep. Finally, if you have medication like epinephrine for several nights of snow camping, it would also be wise to find a place in your bag for that, too.
Start Warm, Stay Warm
Believe it or not, a sleeping bag does not create warmth; it merely traps it. To reduce the time it takes to start feeling cozy, get your body temperature up before getting into your bag. Do some jumping jacks or high-knees before getting into your tent. Pushups, crunches, or bicycle kicks are a great way to bring your body heat up once you’re already in your tent. Get yourself nice and warm, but make sure to stop before you start sweating!
Pee Before You Zzzzz
There is hardly anything worse in the middle of the night than leaving the warmth of your sleeping bag to go pee. To avoid this earth-shattering experience, make sure you have an empty bladder before getting in your tent for the night. Limit excessive drinking before bed, as well.
Sooner or later, though, it happens to us all. If you wake up in the middle of the night needing to pee, it’s best just to get up and do it. The longer you wait it out, the colder you will get. Your body diverts energy to keeping your urine warm in your bladder, making the rest of your body colder. If you can’t bear the thought of going into the snow to pee, consider using a pee bottle. For guys, this is pretty straight forward, and any old bottle with a tight-fitting lid will do the trick. For the women out there, it’s not quite as simple. If you haven’t used one before, consider purchasing a female funnel, such as a She-Wee. This way, ladies, the pee bottle life is also yours to enjoy!
Extra Tools
A hot water bottle tucked into your sleeping bag is like cuddling with a piece of personal sunshine. Use a BPA-free bottle, like Nalgene, and fill it with hot water. Make sure the cap is screwed on very tightly; the last thing you need is a leaky bottle in your bed. Wrap the bottle with a layer if it feels like it would burn your skin. You can also place hand and toe warmers in your bag, which last longer than a hot water bottle and don’t carry a spill risk.
Explore Your World. Award Winning Hiking Guides
Tip #2: Snow Camp Setup
Selecting a Spot
Hazards
Pay attention to overhead trees. Snow weighs down tree branches, causing them to drop. If a tree’s branch shows signs of disease, decay, scars, or has hanging limbs, avoid sleeping underneath. Assess a tree’s overall health. Does it look healthy? Is it a dead tree? If a tree doesn’t look healthy, avoid setting up your camp in its fall zone.
Assess the snow conditions of your campsite. Look to nearby snowbanks and ensure you are not camping in an area with avalanche risk. If there are water sources near your camp, know their location, and ensure there is no risk of accidentally walking on snow bridges or ice in the direct vicinity of your camp.
Fire
If you are dead-set on having a fire on your snow camping trip, know before you go if you can have one. Some areas authorize fires in designated fire rings only. Some allow firewood collection; in others, you have to bring your own. In mountainous regions, your elevation may be a factor in determining whether you can light a fire. If you are camping in California, you will need a campfire permit. Always check your camping area’s appropriate agency for standing and temporary fire restrictions.
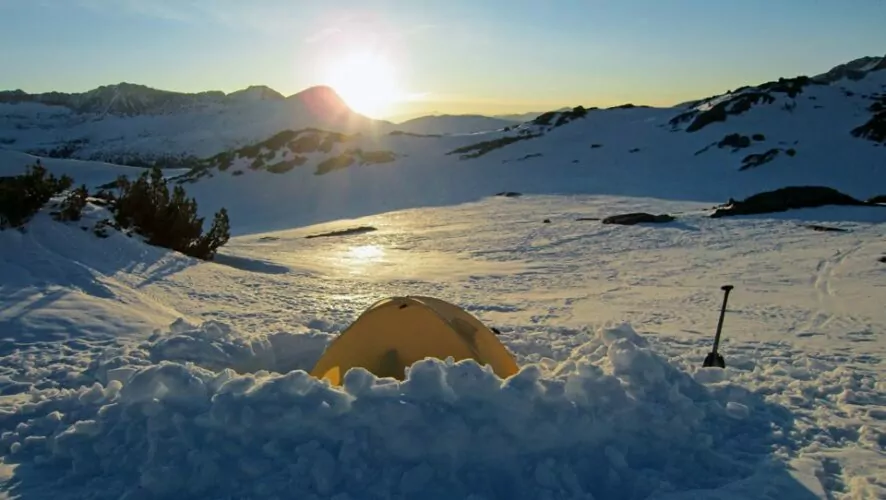
Preparing Your Tent Site
Stomp It Out
Stakes
Patio and Wind Wall
Building a Snow Kitchen
If you are planning to set up a base camp for your adventure, I highly recommend making a snow kitchen. A snow kitchen provides a warm, sheltered place to cook and hang out at night, and is super fun to create! It’s a great way to keep moving (which keeps you warm) at camp, as there are always improvements to be made.
A lightweight snow shovel will be a massive help for this task. Choose a spot for your snow kitchen that is near your tent site, preferably at the base of a hill or snowdrift. The hill can provide wind protection, and the snowdrift means one wall is already built for you.
Just as with the tent platform, stamp down a large area of snow near your chosen site to act as your snow brick “quarry.” Cut a grid pattern into the compacted snow with your shovel and then scoop out individual “bricks.” Stack them up and then seal empty spaces. Use loose snow as “grout” to solidify the wall. Build walls, benches, a table in the middle, and dig out footwells between the seats and table.
Get creative by adding unique touches like cubbies for gear, enclaves in the wall for candles, an “icebox”, or a string of lights. Finish it off by securing a lightweight tarp over the walls to trap in heat and keep the elements outside.
Toileting
In the summer, when “nature calls,” you can bury your waste in a cat hole (a 6-inch minimum hole dug in the soil). In the winter, that soil is covered by several feet of snow. As such, the cat hole method is not an option when camping in the snow.
Pack It Out…
Best practice for pooping in the snow is to pack it all out. WAG Bags are specially designed products for this task. They are spill-proof, odor-proof, and some, like Cleanwaste’s Go Anywhere Toilet Kit, include both toilet paper and a sanitizing wipe in the kit. On a multi-day snow trip, carrying multiple toilet kits may not be feasible. For longer backpacking trips, alpine climbing excursions, and other instances of traveling where you cannot dig cat holes (such as winter camping!), many people opt for a poop tube: a simple plastic tube, such as a wide, screw-top PVC pipe. These tubes are seal-able, more durable, and are better apt for the lovely task of carrying more poop.
…Even Toilet Paper
Toilet paper should always be packed out, whether you are camping in the snow or not. Buried toilet paper has a tendency not to stay buried for long, leaving unsightly “paper trails” in popular camping areas. Always bring an extra zip-lock bag to pack out toilet paper, baby wipes, and feminine hygiene products.
Explore Your World. Global Trekking Adventures
Tip #3: Layer Up
Clothes to Pack
Sleep Clothes
Day Clothes
Outerwear
Materials
Tip #4: Keep Dry
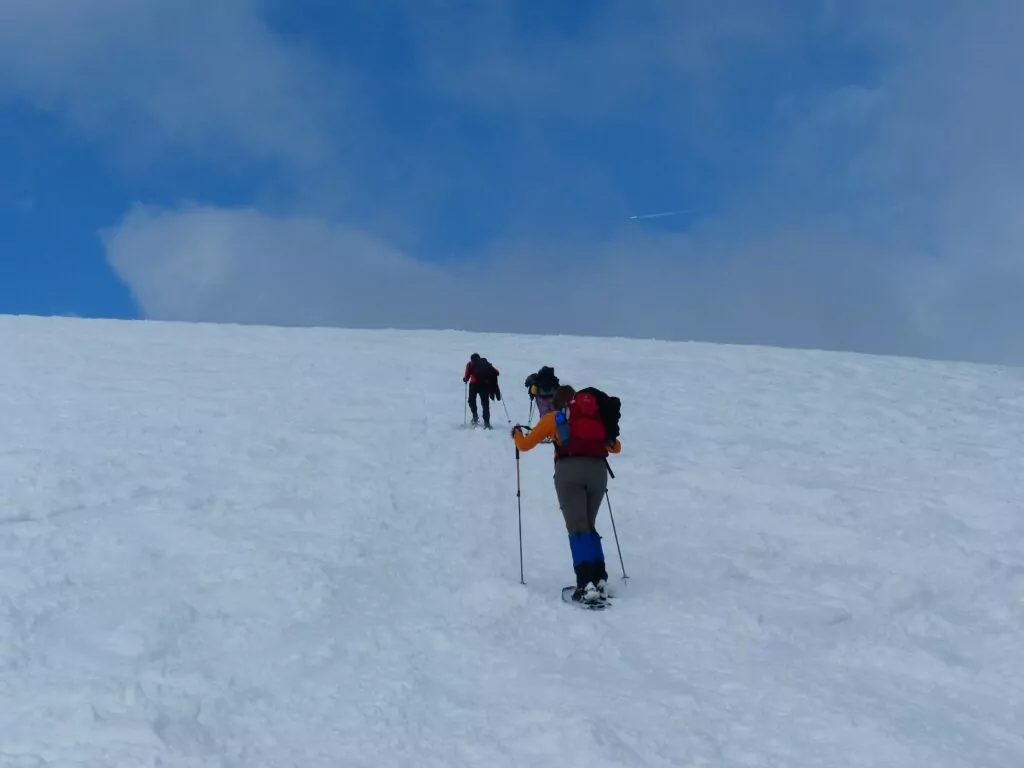
Avoid Sweat
Sweat = wet. While it is not possible to avoid sweating entirely, especially if you are hiking or snowshoeing, try to limit it. As soon as you start to feel warm, take off a layer before your body compensates with sweat. Once you sweat, it collects in your clothes and actually makes you colder once your body temperature drops again. This also goes for getting in your sleeping bag at night. It’s best to start with minimal layers in order to avoid waking up in a sweat and needing to delayer. Start your activities and sleep with the age old mantra, “Be Bold, Start Cold!”
Keep Your Waterproof Gear Ready
Be Bothered
Tip #5: Eat Right
Calories
Our bodies constantly burn calories to maintain our desired body temperature. When our bodies are cold, we have to burn more calories than usual. If we don’t have enough extra calories, our bodies struggle to stay warm. On a snow camping trip, plan calorically dense food into your menu and plan to eat between 3,000 and 5,000 calories per day. So say “YES” to that extra helping of Alfredo pasta, your body needs it!
Food for Sleep
Proteins and fats burn slowly, providing your body with prolonged heat. Just before bed, a bit of peanut butter or dried meat will help to heat you up from the inside. As long as you are not in bear country, keeping a snack like this in your tent can help you get back to sleep if you wake up cold.
Snack
Snack often throughout the day. As already mentioned, cold temperatures require more calories than normal and will help to keep you warm. Sugar burns quickly, for a flash of heat and energy followed by a quick drop to your previous body temperature. These types of snacks are good during the day for fast energy. Snacks with more fat and protein stick with you for longer.
Hydration
Keeping well hydrated when it’s cold can be challenging. You may not feel thirsty, even when your being active. To avoid getting dehydrated, drink water often and at regular intervals. In the mornings and evening when it’s coldest, warm up and hydrate with a hot tea or even just warm water with lemon.
Cooking and Preparation
Isobutane canisters do not perform as well in the snow as they do otherwise. If you are relying on this type of fuel on your snow trip, store your fuel inside your tent and warm it in your sleeping bag or jacket pocket before using it. White fuel, as used with the MSR WhisperLite, is much more efficient in lower temperatures and is generally recommended for snow camping. Alcohol stoves also do well but should be paired with a wind screen and be able to be elevated off the ground.
Planning food can be a daunting task no matter the weather. In the snow, when you aren’t going to want to take your fingers out of your gloves, convenience is your friend. Pack meals that are comforting and easy to prepare, such as dehydrated meals. There are many other, budget-friendly options for meals that require only boiled water, such as mac and cheese, couscous, instant mashed potatoes, and soups. Food goes cold very quickly in the snow. Reduce your food’s surface area by using a deep bowl to keep your food piping hot!
Get out there and have fun this winter! Stay warm, safe and informed while camping in the now. For more help with planning a multi-day snowy excursion, read our guide to Planning a Winter Backpacking Trip.
Hike Winter Creeks and Peaks with a Guide
Guided Winter Hiking & Backpacking Trips are available, and are a stress-free, exciting way to do this trip. The tour company handles permits, gear, transportation, meals, and provides a professional guide so you can focus 100% on enjoying your adventure.
Wildland Trekking Hiking Adventures
As the world’s premier hiking and trekking company, Wildland believes in connecting people to fantastic environments in amazing ways. Wildland Trekking Company offers an array of incredible hiking and trekking experiences in 9 states and 11 countries. Read more about our world-class destinations.
To learn more about our guided backpacking trips and all of our award-winning hiking vacations, please visit our website or connect with one of our Adventure Consultants: 800-715-HIKE.

