


Hiking Half Dome: Everything You Need to Know
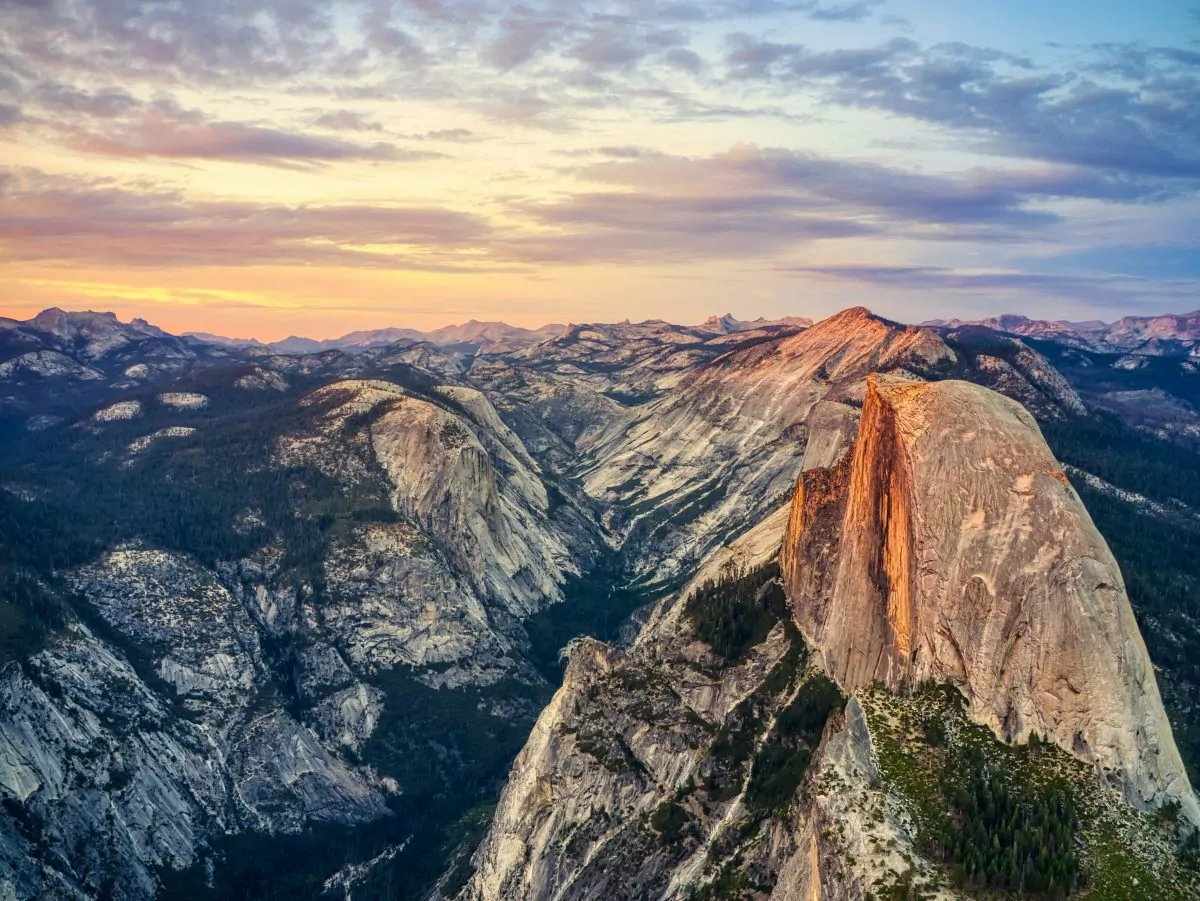
Photo by Venti Views on Unsplash
Three days after saying “yes” to an open spot on a guided trip to hike Half Dome, I met five women in Curry Village. After introductions over pizzas, we pitched tents at the Yosemite Valley Backpacker’s Campground and laid horizontal in bras and undies in the nearby shallow creek. The next day, we drove to Glacier Point, where we adjusted the shoulder straps of our heavy packs with a stretched-out version of Half Dome looming in the distance.
Then we started hiking. Our legs were fresh, and our minds cleared with each dusty stomp that brought us further into the woods. After reaching our first backcountry camp at Illilouette Creek, we devoured a lunch fit for queens of the woods —pita, hummus, salami, and peppers, laid out on a large tree stump. Later, we soaked in the river, giggling, before watching in silence as the sky turned orange and purple, reflecting over the rapids.
On the second day on the trail, we scattered around the top of Nevada Falls, exploring the expanse of smooth granite that framed the Merced River as it plummeted 600 feet to the forest floor. We reached our camp at Little Yosemite Valley by lunchtime, where we spent hours resting and hiding from the intense sun before embarking on our final ascent that evening.
After a long, sweaty, tiring day, we finally reached the base of the cables. When we realized we had them all to ourselves, we shared a sigh of relief. One group had started up ahead of us, but no one was heading down. Our guide’s laid-back demeanor changed; the seriousness in her voice demanded our attention. “No photos while on the cables. Take your time. Make sure the next wooden step ahead of you is free before you begin walking towards it.”
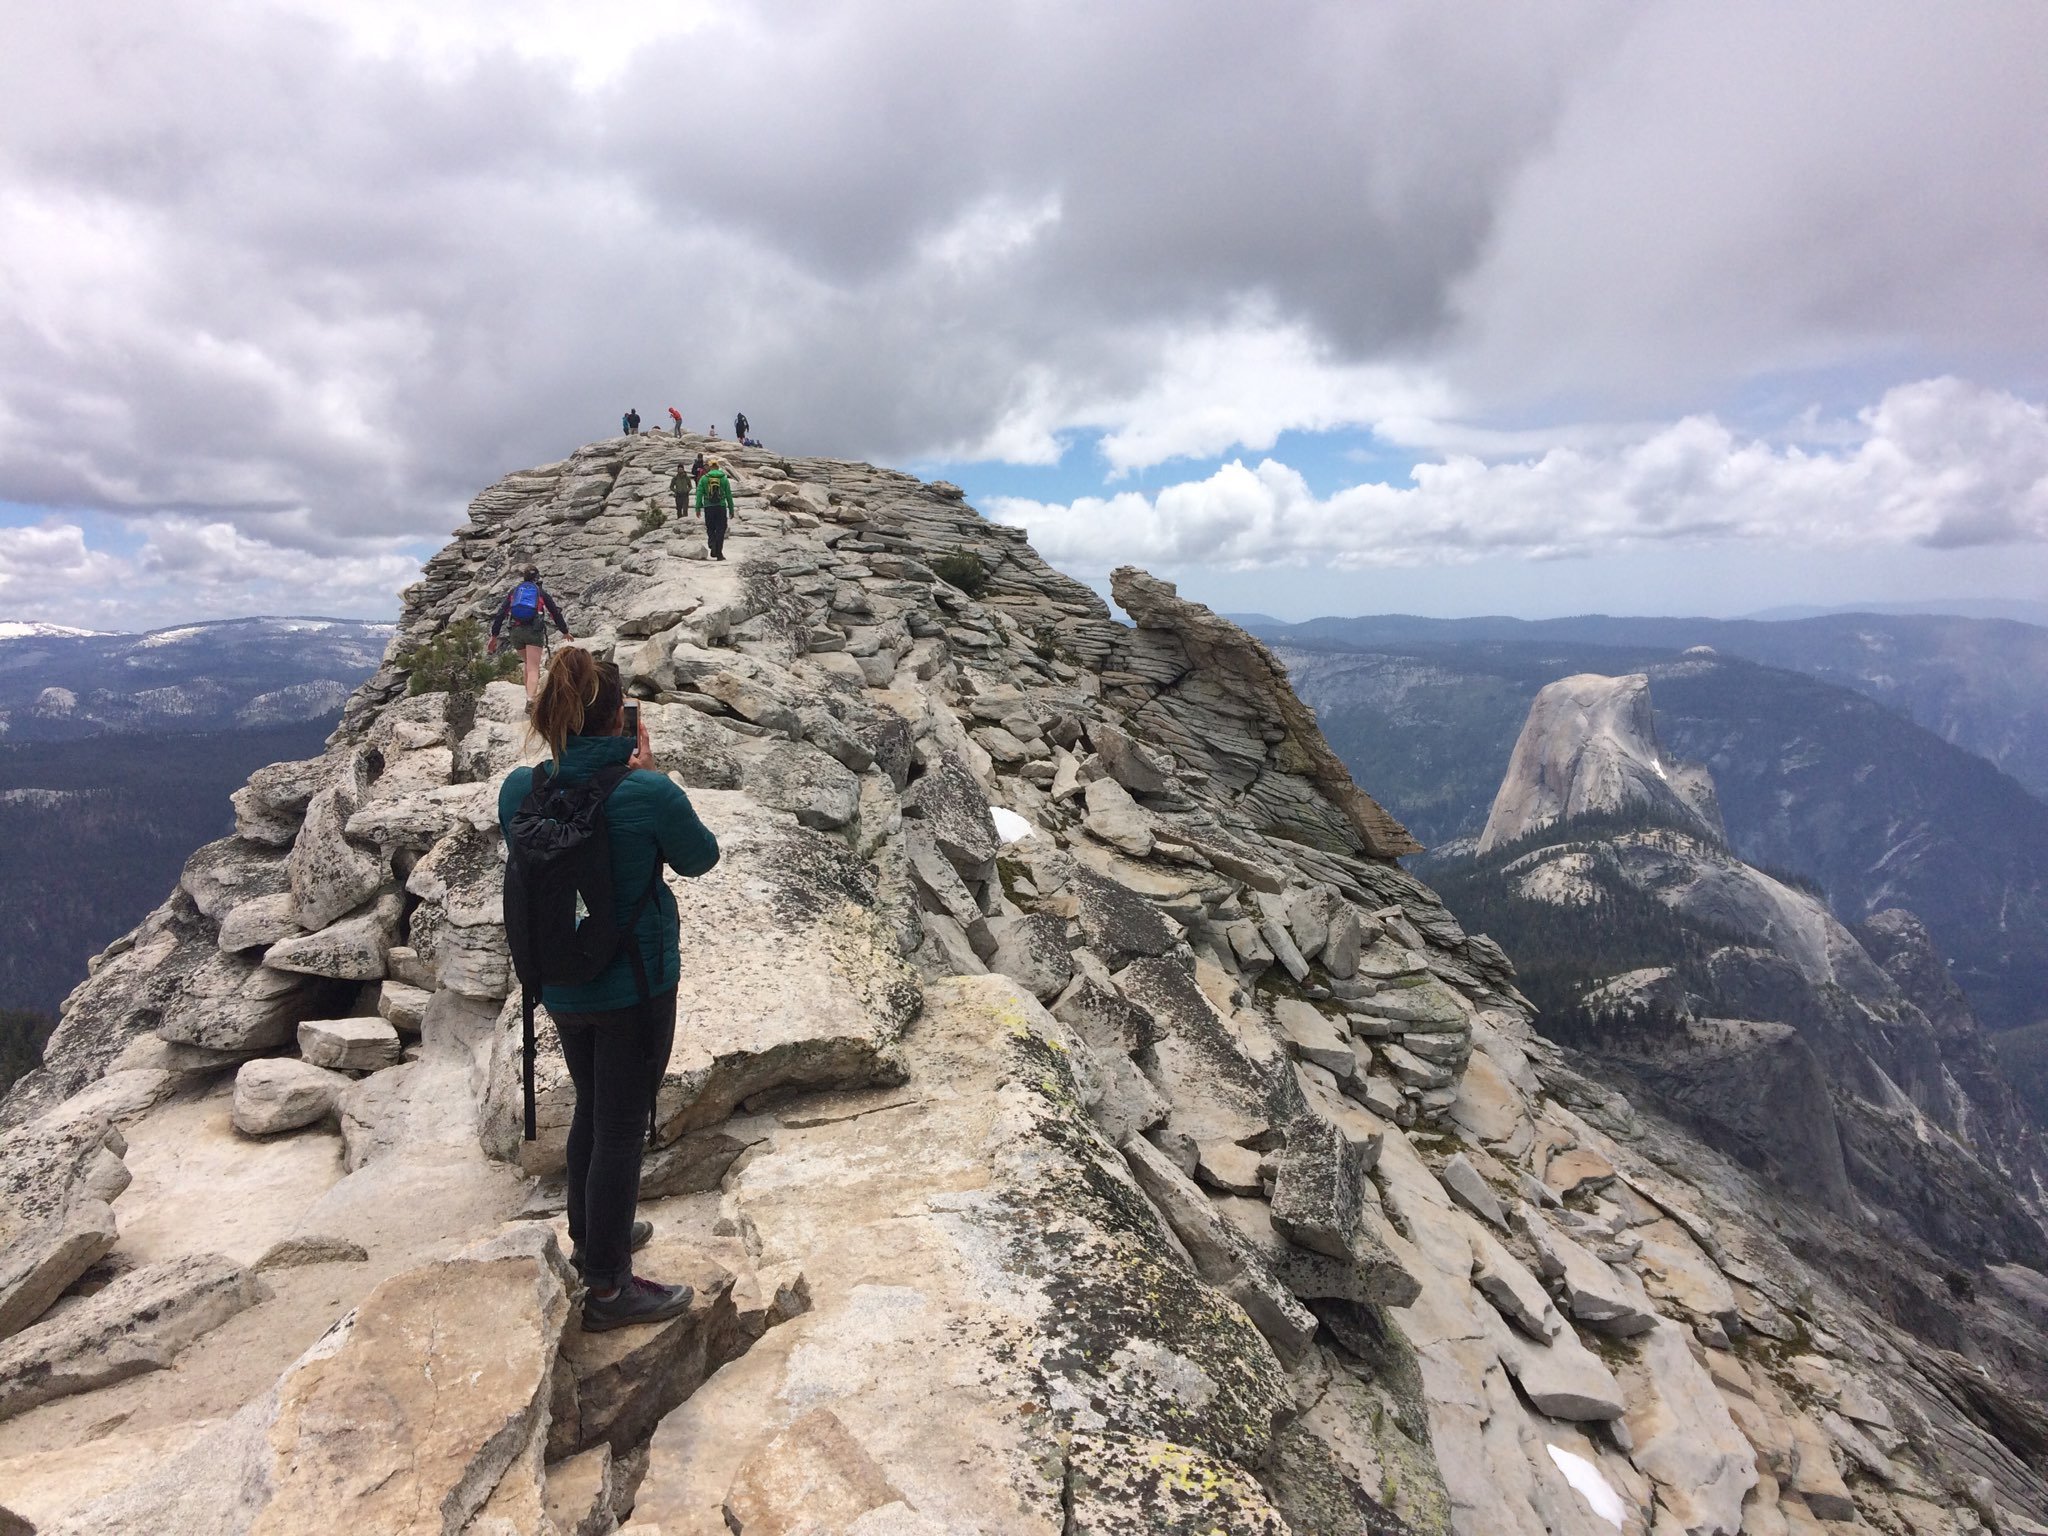
We all looked up at the summit. Only 48 hours after meeting, we were a team. I unclipped my gloves from the belt loop of my shorts and grabbed the inch-thick metal cables on both sides of my torso. At the same time, I pushed my boots hard into the grey and black speckled surface, willing my tread to stick. Step by step, I made my way up the wooden planks that lined the granite dome. Sometimes the cables went as high as my armpits, causing my muscles to become awkward and tense. I guess kayaking on Lake Tahoe was not enough for upper body training. But the one-of-a-kind views, steep ledges on both sides, and forward progress of my team helped me roll through the pain. As I reached the apex and the convex slope led me to the final few steps, I heard cheers from my new friends. Tiny droplets of gratitude drizzled from my eyelashes. At the top, we celebrated by calling our parents, posing on the diving board, exploring the vast mesa, and staring out at the valley, remembering all the times we’d looked up to this very point.
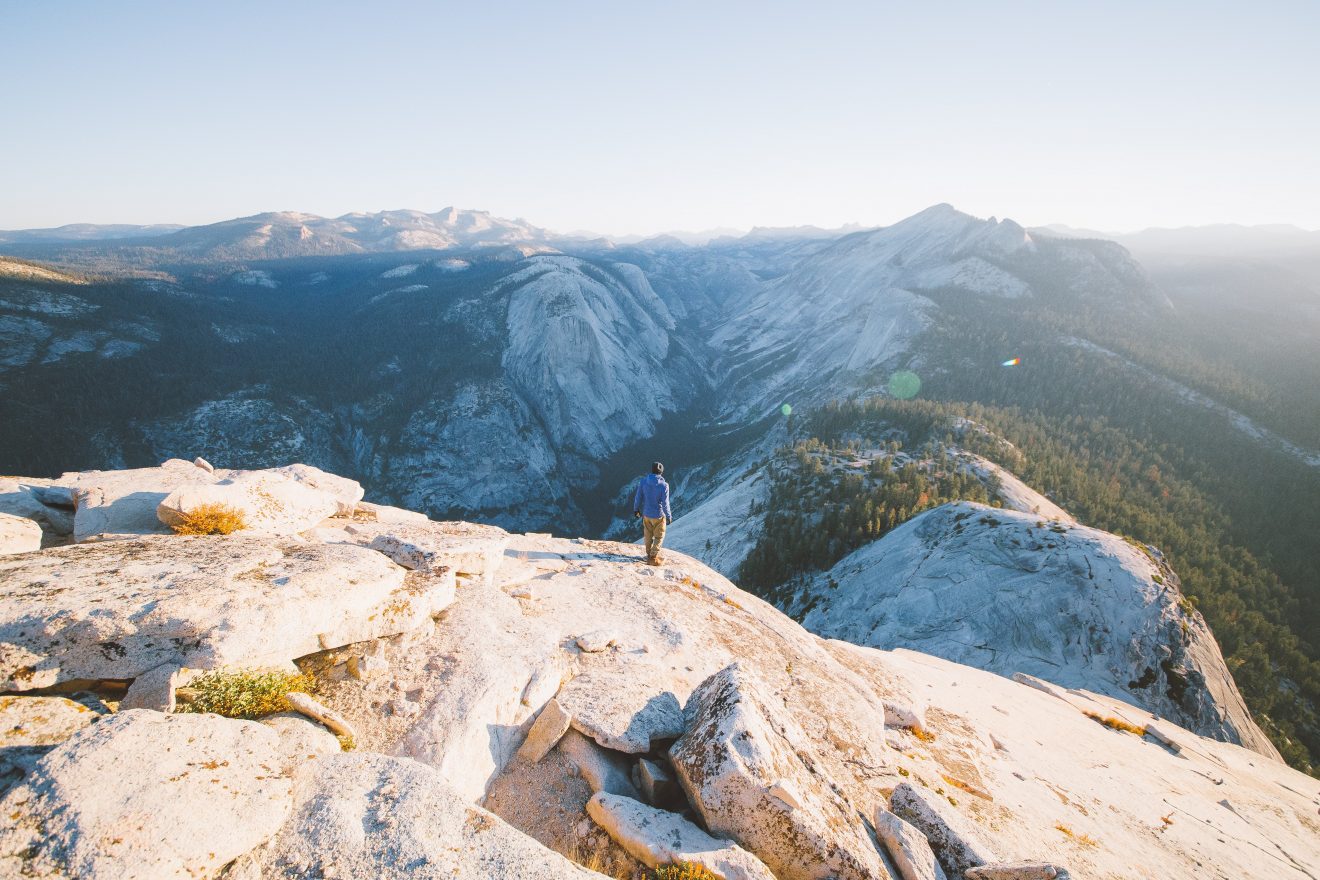
Photo by Jonathon Reed on Unsplash
After a silly group photo, we started the descent. We turned backward on the cables, guiding the person above us on what their feet should expect. “No looking behind you,” our guide demanded. I peeked between my legs once or twice but otherwise focused all my energy on my partner. Once we were back on the trail, the last hour to camp was a quiet slog. A few of us went straight to the Merced River and bathed under the moonlight, with only rumbling crashes of water audible.
On the final day, we hiked back to Glacier Point. Every bend in those last few miles up to the parking lot was a tease. My body wanted nothing other than to remove my boots and shove an entire bag of potato chips in my mouth. Eventually, we made it and took one last group photo. Hugs at our tailgates exuded both joy and sadness. I already missed these women and what we had accomplished together.
Hike Half Dome with Award Winning Guides
Why Hike to the Top of Half Dome
In this guide, we provide tips and recommendations for making your Half Dome trek an exceptional experience, including how to obtain permits, when to go and what to bring.
What do you picture when you think of Yosemite National Park? Half Dome is one of the most iconic rock faces in California’s Sierra Nevada Mountain Range and even the country! The moment you come around the bend in the road, and the view opens to perfectly frame this renowned rock towering over a windy green valley, you have arrived. You are in the land of the Awaneechee people, and you can see, feel, and hear the spiritual presence of this place.
Half Dome embodies all that is Yosemite. Historical. Majestic. A geological wonder. Before you summit Half Dome, you stare up at it, admiring the enormity and feeling a sense of impossibility sending shivers down your spine. It towers above, looking over all its visitors—the one constant.
The Sense of Accomplishment
Once you are at the top, your perception changes. You know the hidden route to its summit and wild ledges that only some dare to stand on. You know the views in every direction, how it feels to share a moment with others who navigated the same mental and physical challenges to reach that point.
Back on the valley floor, you can’t seem to stop smiling. A giddiness flutters inside. Pride surges from your mouth, and you holler to your trail mate, “I’ve been up there!” After you’ve stood upon its lofty summit, you return to gaze at its sharp face under the smooth cap, like smiling at the tree you used to climb as a kid.
The One-of-a-Kind Experience
When else can you summit such a sheer and elevated chunk of granite without climbing gear? Please, tell me, because I’d like to do it again. But, presumably, like you, I don’t want to deal with the ropes, harness, and decades of skill development necessary to scale these walls without human-planted cables. Climbing is not my sport, but backpacking is. And this backpacking trip allows you to conquer some fears.
The Non-stop Views
You’ll see a greater variety of views along the trail to Half Dome than if you hike every trail from the valley floor. After visiting Yosemite National Park for 20 years, I thought I knew all of the curves of that voluminous rock. And yet, she still bewildered me. When I’m backpacking, I try not to click my camera excessively so I can soak in the views. However, with the constantly changing formation of my beloved unfolding before my eyes, I couldn’t help but snap a new frame repeatedly.
Lastly, how about a 360-degree view of what feels like the entirety of the Sierra Nevada Mountain Range? Yeah, that’s up there too.
Hiking Half Dome: Guided or Independent?
Guided
There are many benefits to choosing a guided trip for an excursion like summiting Half Dome. First, the guiding company secures the permit for you. Second, your guide will be responsible for timing—they will ensure your group arrives at the cables at a preferable time of day. Third, a guide will check and provide all the necessary gear (listed below) and make sure you bring enough water and food, which are all crucial to a safe and enjoyable trip.
If there is any gear that you don’t already own— like a tent, sleeping pad, or sleeping bag—the guide will provide this as part of the trip cost. (A fantastic way to try out gear before you buy it!) Even though I supplied my own equipment, I loved scoping out the shiny new backpacks, one-person tents, hanging water purifier, and stove and pot system the guide brought.
Since this trek is so time-consuming, you’ll need accommodation before or after you start hiking. Both campgrounds and lodging within the park book up in the spring. A guiding company will take care of these logistical details for you.
But there is one benefit of a guided trip above all the others—connection. Reaching the summit of Half dome is only one highlight among the many—but my favorite was getting to know my trail mates. Maybe none of your friends are interested in this adventure. If you want to do this, then do it! It’s like traveling in a different country, solo, or thru-hiking for two weeks to two months. You build a new community, and you’re never alone.
Guided Yosemite Backpacking Trips
Independent
The hardest part of hiking Half Dome without a guiding service is the logistics. At this time, Yosemite National Park has a quota of 300 permits per day (225 day hikers and 75 backpackers). A permit is required seven days a week while the cables are up*, from approximately May 27th through October 10th this season (2022). There was a pre-season lottery, but it has closed. Day use permits will be released through a daily lottery, but backpackers should apply for Half Dome permits with their wilderness permit. Applications are available two days in advance and open on May 25th. Visit Recreation.gov or call 877-444-6777 to apply.
There is a separate quota for those that have backcountry permits from the appropriate trailhead (options listed below) and want to add Half Dome to their itinerary. Click here for more information on accessing Half Dome over a multi-day trek.
*Note: Half Dome should only be summitted without cables by experienced climbers with the necessary gear. Wildland Trekking does not guide any Half Dome treks when the cables are not installed.
-
Deeper Dive: How to Enter the Lottery for Half Dome Permits
-
Permits for Half Dome must be reserved on recreation.gov through a lottery system, so there is no guarantee that you will get a permit. To apply for a permit, fill out the form on recreation.gov, and pay the 10-dollar application fee. The lottery for preseason permits opens on March 1st and closes on March 31st, and the notification of the results is sent out on April 10th. Lottery winners must accept and pay for their permits by the set acceptance date. While the Half Dome cables are usually up by Memorial Day, if weather restricts the installation of the cables and they are not up by the date of your permit, the National Park Service will refund the permit fee (but not the application fee). Unfortunately, if this happens, it is not possible to switch the dates on awarded permits.
If you did not apply in time for the preseason lottery or did not receive permits in your preseason application, you can apply for the daily lottery two days before you wish to hike Half Dome. For instance, if you desire to hike Half Dome on June 3rd, you can apply for the daily lottery on recreation.gov on June 1st. Recreation.gov has a lottery schedule chart with all the dates for the year for further reference.
As mentioned above, there are about 225 permits per day that are available in the preseason lottery. At least 50 permits are available for the daily lottery. The main takeaway here is to plan and apply early for the preseason lottery; and if you are not selected for a permit, be flexible and apply for the daily lottery as many days as you can. Or, join a guided trip!
Route & Trailhead Options
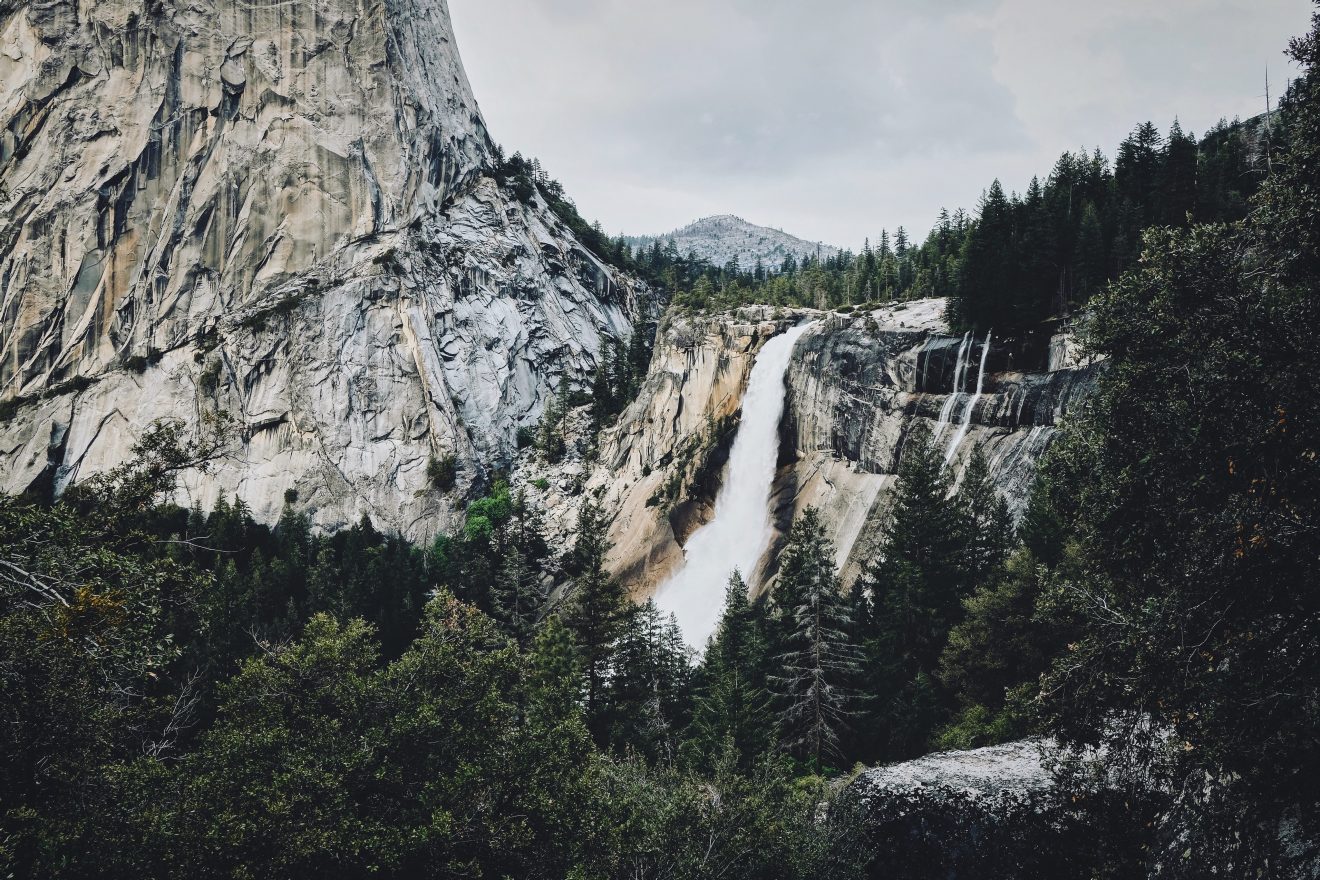
Photo by Sam Windey on Unsplash
1. Happy Isles (Yosemite Valley)
This is by far the most popular and direct route to Half Dome, for both day hikers and backpackers. The trailhead for the hike to Half Dome is at Happy Isles Trailhead (shuttle stop #16). You will begin on the Mist Trail from there. Shuttle buses don’t begin until 7 am, so if you plan on starting the hike before then, you will have to drive to the trailhead. Parking areas are located at Happy Isles or at Curry Village (it is a ¾ mile walk from this parking lot to the trailhead).
Distance: 7 miles
Elevation: 4,800 ft ascent
Benefits: Mist Trail, proximity to backpacker’s camp, day trip optional
Challenges: most popular
2. Sunrise Lakes (Tenaya Lake)
Distance: 12.6 miles (Cloud’s Rest route)
Elevation: 1,800 ft ascent to Cloud’s Rest, 3,800 ft descent to Little Yosemite Valley, 2,700ft ascent to Half Dome
Benefits: Cloud’s Rest summit, option for point-to-point trip exiting at Happy Isles or a loop via John Muir Trail (JMT) along Sunrise Creek
Challenges: backcountry required; campgrounds currently closed at Tuolomne Meadows
3. Cathedral Lakes (Tuolomne Meadows)
Distance: 17.6 (Cloud’s Rest route)
Elevation: variable
Benefits: Cloud’s Rest, Cathedral Lakes, option for point-to-point trip exiting at Happy Isles or a loop via JMT along Sunrise Creek
Challenges: backpacking required; campgrounds currently closed at Tuolomne Meadows
4. Rafferty Creek (Tuolomne Meadows)
Distance: 25.7 (Emeric Creek route)
Elevation: 1,380 ft ascent to Vogelsang, 2,000 ft descent to Merced Lake, 2,000+ ft ascent to Half Dome
Benefits: Vogelsang, numerous route options
Challenges: popular trailhead due to access to Vogelsang, campgrounds currently closed at Tuolomne Meadows, backpacking required
5. Glacier Point
One-Way Distance: 12.2 miles (Illilouette Creek Route)
Elevation: variable
Benefits: Illilouette Falls, option to loop to the Mist Trail exiting at Happy Isles, or to Panorama trail back to Glacier Point, day trip optional
Challenges: Glacier Point Road closed in 2022, so no permits are available this year
*NOTE: All distances and elevation are approximate. Consult your own map, trail guide, or ranger station.
Know Before You Go
The main route for hiking Half Dome trail starts on the Mist Trail at Happy Isles. You can either stay on the Mist Trail at the fork, and continue past Vernal and Nevada Falls to the John Muir Trail. Or, you could take the John Muir Trail all the way to the base of Half Dome—this is less populated but you miss out on two waterfalls. Depending on which route you decide to take, the trail is 14 to 16 miles, and usually takes hikers 10 to 12 hours. Once you reach the base of Half Dome, the infamous cables take you straight up the face of Half Dome.

The Cables
The Cables: What to Expect
When you finally reach the base of the cables, they look like a stairway to heaven. You can’t actually see where they end, as they curve off to the top of Half Dome. They are sectioned with intermittent wooden steps that are about two inches thick for you to stand on and take a breath in between the pulling. At each of those steps is a vertical pole, which the cable runs through. Most people do not wear a harness and do not attach themselves to the cables in any other way besides the grip of their hands.
On the cable descent, walk backward. It’s safer and easier. Although the climb up was exhausting, the climb down felt cruisy. Stare into the granite, walk backward slowly, and communicate with your trail mates above and below to guide one another through tricky spots.
Timing
Here’s the thing – there is only one lane on the cables for both uphill and downhill hikers. This one-way street services 300 people each day to get up and then down. Timing is key to avoid standing in line for hours or risk being on the cables while others attempt to travel in the opposite direction and leave one or both of you in an uncomfortable and unsafe position. But no matter how crowded it gets, you should never duck under the cables to stand on the outside!
Before I summitted, I thought everyone went up to Half Dome for sunrise or mid-day. For a day trip, these may be your only options. However, while backpacking, a sunset summit is also possible. Regardless, try to ascend and descend when the least amount of people are there.
Comfort/Discomfort with Heights
Deaths and serious injuries have been rare in recent years, but they happen. You’re putting your own life in your own hands, literally. It’s your responsibility to keep both hands on the cables at all times, maintain your footing, and keep moving forward. You are pulling yourself up a ladder, at 8,836 feet, on a rounded, smooth, granite surface, with ledges on all sides. I would not recommend this trip to anyone with a fear of heights. Even as someone who has gone skydiving and paragliding with excitement, my internal butterflies fluttered when looking left or right.
Training: Upper-Body Strength
As I mentioned above, this is not your typical backpacking trip, and the cables will require upper body strength on the ascent. The group consensus on my trip was that the shorter you were, the more challenging the cables were. Although I came into the trip feeling in great shape through hiking and running, my arms were not as prepared. It was exhausting! Get into a regiment of push-ups, planks, and tricep curls. If you’re able, hire a personal trainer. It’s only 400 feet, but it’s 400 feet straight up! And, you’ll be able to better focus on safety and the experience if your arms can carry you there.
Training: Full-Body Endurance
Obtaining permits for Half Dome is a huge part of the preparation process. But physical preparation for a long and strenuous hike like Half Dome is even more important. This 14 to 16 mile hike will take you a majority of the day to complete; for most hikers, it takes about 10 to 12 hours. Any long hike is going to wear you down, but Half Dome will even more. The elevation change from the trailhead at the Valley floor to the top of Half Dome is 5,000 feet. Meaning, you will feel it in your legs, lungs, and heart. So getting your body prepared is essential to having a safe and fun experience on Half Dome.
Below are some ways to build your stamina and strength for hiking Half Dome:
- Climb Stairs: Running up and down a set of stairs is a great way to train your body for Half Dome. It will boost your aerobic fitness, strengthening muscles in your hamstrings, glutes and other leg muscles. Before starting to run the stairs, warm up your muscles by walking the stairs or running a few laps.
- Train in the heat: Unless you start your trek before the sun comes up and have completed by mid-morning, you will be hiking in the heat of the day. It is important to see how your body reacts to physical exertion in the heat. Some good and safe ways to train are to go for a walk in the sun or practice hot yoga.
- Hike Difficult Trails: If you live in lower elevations, the drastic change in elevation is going to hurt your lungs and body. If possible, try to hike challenging trails that have an elevation change of at least 1,000 feet. This will help train your lungs for the arduous elevation change of Half Dome. Hike these trails multiple times and try to improve your time each hike.
Dehydration
I’ll never forget the story from one of my friends when she suffered dehydration while summiting the cables. She’s hiked worldwide and is an avid trail runner, so I was shocked she was too loopy to eat her lunch. There are no water spigots along the trail. You will need at least four liters of water per person for a round trip. On hotter days, you’ll need more. If you come straight from sea level, you’ll need more. If you have a proper water filtration system, you don’t have to carry all your water. But remember that Merced River, in Little Yosemite Valley, is the last water source before the summit.
Seasonal Considerations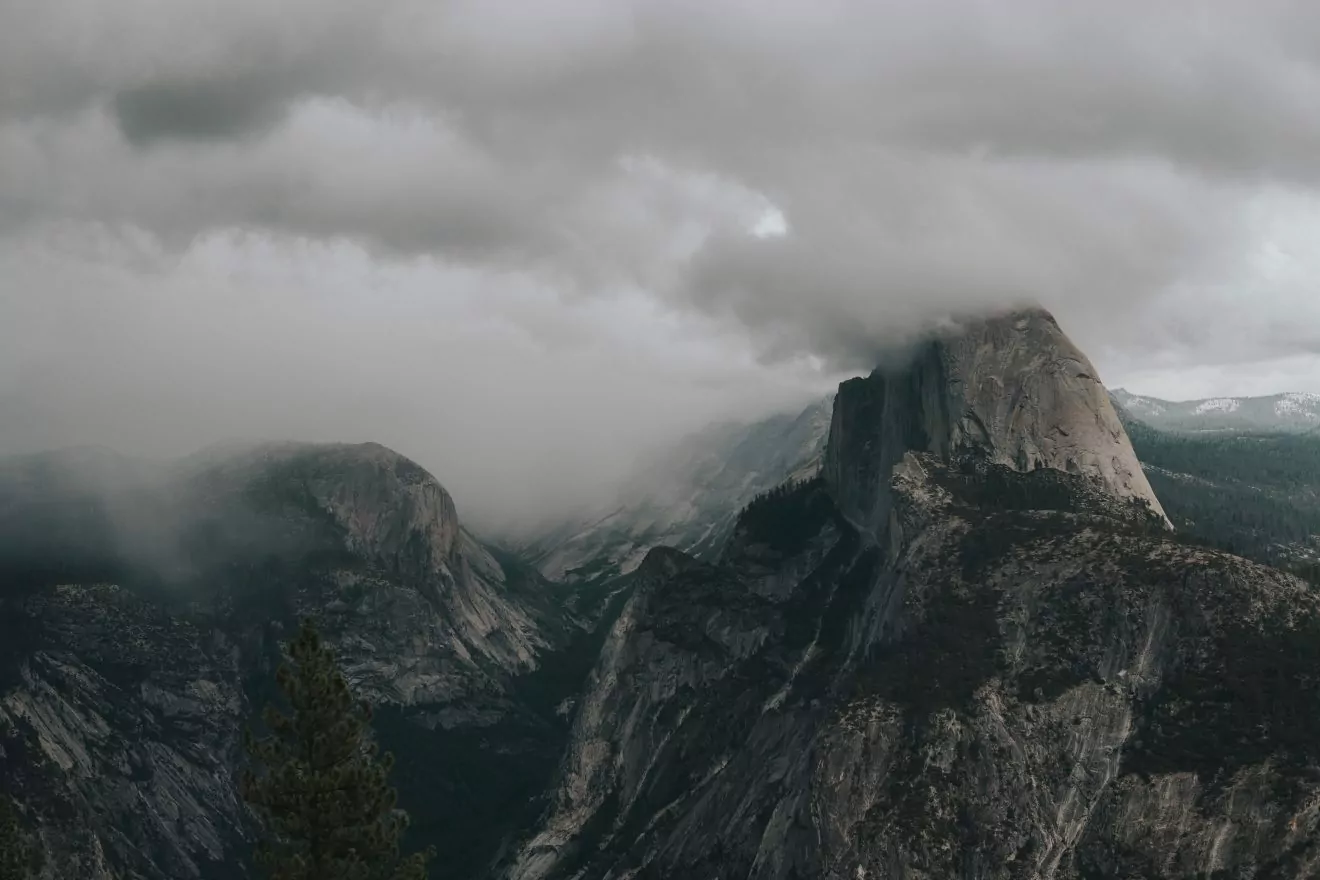
First, the cables are only up from the end of May to mid-October each year, so you’ll need to plan your trip during these dates. Second, California is susceptible to fires which can affect park closures or air quality. Be prepared for trip cancellation, forced or by choice. Second, Half Dome is completely exposed. With any moisture on the ground, the surface will be slick, and even with well-treaded boots, you should not attempt. This includes snow.
Additionally, check the forecast for thunder and lightning, and constantly have your eyes and ears peeled. If there is any sign of an electrical storm, do not attempt. If already en route, return to tree line as quickly and safely as possible.
Where to Stay
Campsites, tent cabins, and hotel lodging are available within Yosemite National Park. Click here for options, including private accommodation outside of the park. Regardless, book far in advance. The only backpacker’s camp open this season is in Yosemite Valley. Half Dome day permit holders are not permitted to stay at the backpacker’s campground. Camp 4 is a walk-in tent-only campground in Yosemite Valley available by daily lottery one day in advance of the arrival date.
What to Bring
For a multi-day trek, you’ll need a complete backpacking kit. As a day hiker, Half Dome still requires vital considerations. See above for water requirements. Also, pack way more food than you think you’ll need – two meals plus snacks and electrolytes. A headlamp with extra batteries is a must since you are guaranteed to be hiking in the dark, whether pre-dawn or post-sunset.
You’ll need leather gloves or other sturdy, grippy gloves that can withstand rubbing to climb the cables. I highly recommend a form of emergency communication, like a Garmin inReach. You won’t have cell phone reception in many sections, and your phone can go flat, especially if using a GPS app.
Finally, you will need shoes with a good grip. This is non-negotiable: street running shoes will not suffice. Hiking boots, backpacking boots, or grippy and deep treaded trail runners are necessary. When you add 225 pairs of feet rubbing into an already round, smooth granite every day for five months each year, with centuries of wear from snow and rain, you find one of the most slippy surfaces out there.
Even with a hike like Half Dome, the most important goal is returning home safely to your friends and family, so you can continue to enjoy more adventures. Kudos for taking the time to learn everything you need to know! Now, reread it! And continue your research if you’re planning an independent trip. If you’re already exhausted and overwhelmed and want assistance, check out our guided trips.
Join a Guided Hiking Adventure
 Yosemite National Park is home to some of the most epic and amazing hiking vacations in the world. Wildland Trekking offers trips with the best of Yosemite: waterfalls, views, wildlife, solitude, adventure and fascinating natural and cultural interpretation.
Guided Yosemite treks are all-inclusive which covers permits; local transportation (excluded on certain tours); meals; equipment; safety systems and professional hiking/wilderness guides; all of which allows visitors to maximize their time in Yosemite and focus entirely on enjoying the Park.
YOSEMITE ADVENTURE TOURS
GUIDED YOSEMITE BACKPACKING ADVENTURES: these are for people interested in an authentic Yosemite hiking adventure away from the roads and crowds.
PORTERED YOSEMITE TRIPS: on these innovative trips, guests hike with light day packs and camp near in stunning backcountry locations.
INN-BASED YOSEMITE HIKING TOURS: these tours are all-inclusive packages with lodging, amazing daily hikes, expert guides, meals, transportation and more!
YOSEMITE CAMPING TOURS: camping-based hiking packages provide all-around hiking experiences of Yosemite on wonderful outdoor vacations.
YOSEMITE DAY HIKE TOURS: maximize your day in Yosemite on a fully guided, award-winning hiking tour on one of the Park’s best trails.
