


10 Easy Steps to Planning a One Week Thru Hike
Your friends call and ask you to accompany them on a one week thru hike. Initially, you are ecstatic, but then reality sets in. Where do I begin? What do I need to bring? How heavy is my pack going to be?
Most of us find trip planning to be a dreaded undertaking. Planning for a backpacking trip takes even more time and attention. Planning and packing for a one week thru hike can be a daunting task. Something left behind, like a toothbrush, is no big deal when you are away in the woods for one or two nights; however, no one wants to use a finger to brush his/her teeth for one whole week!
By following the ten easy steps outlined below, you will be packed, organized, and ready to set out on your grand adventure on the trail without developing any grey hairs or worry lines.
| Steps | |||
| #1. Choose a Trail | |||
| #2 Pick a Season | |||
| #3 Permits | |||
| #4 Emergency Exit Plans | |||
| #5 Shuttles | |||
| #6 Gear | |||
| #7 Food Planning | |||
| #8 Shopping | |||
| #9 Food Prep | |||
| #10 Packing |
Expert-led USA Backpacking Adventures
1. Choose a Trail

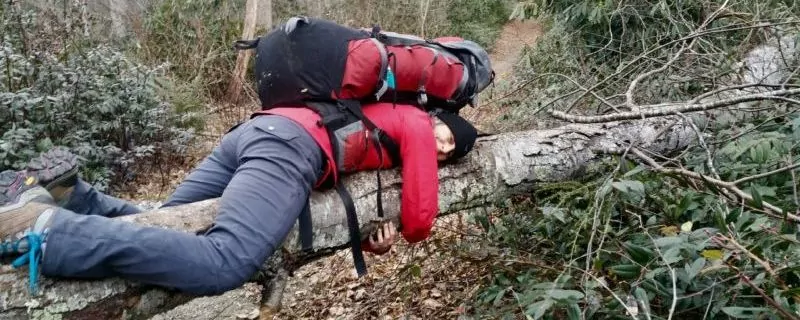
Step one in planning any trip is planning where you want to go. Maybe a friend or a YouTube video sparked your interest in a particular trail. Or maybe just like me, you want to discover what is in your own “backyard.” I live near the Appalachian Trail in Western North Carolina. I am about to embark on a one week thru hike from Wesser, NC, to Gatlinburg, TN.
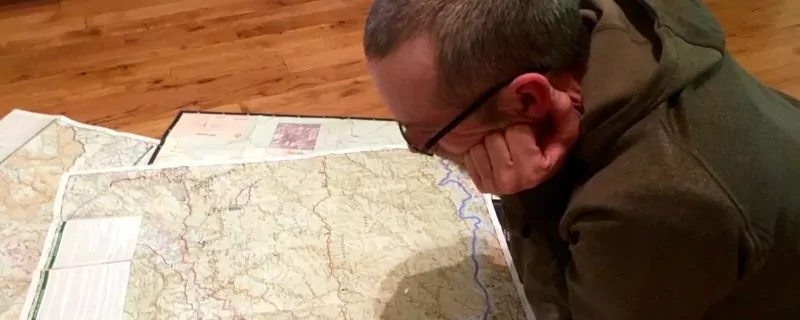
Regardless of where you choose to hike, researching the trail is important. Pull out the guide books and maps of the area. Study the trail. Talk with others who have hiked this path. Gather as much intel as possible about your upcoming adventure. This information will help in future steps of planning a one week thru hike.
2. Pick a Season
The next step in planning a backpacking trip is picking your preferred season for hiking. What do you want out of your hike? Warm days for swimming in waterfalls? Cool nights for camp fires? Quiet and stillness with limited human interactions?
I like warm days so that I can hike in shorts, rinse off in rivers, and play in waterfalls. But I also like cool, crisp nights for campfires and cozy sleeping bags.
Western North Carolina can have bone chilling nights in winter and spring. The summers are wet, hot, and humid. So my one week thru hike will be during autumn with the goal of warm days, cool nights and, hopefully, less rain and humidity.
Advantages:
- Less people/crowds
- Better views
- Less creepy, crawlies (mosquitos, ants, spiders, ticks, snakes)
- Perfect temperature for hiking in Florida
Disadvantages:
- Colder temperature
- Limited fauna and flora
- Some trails closed
- Less daylight
- Heavier pack weight (winter clothes/gear weighs more)
- Possibility of frozen water sources
Advantages:
- “Greening of the woods”
- Moderate temperatures
- Abundant water sources
Disadvantages:
- Rainy season
- Creepy, crawlies
- Heavier pack weight (packing for two seasons: cold temperatures at night and warm days)
Advantages:
- Lighter pack/gear
- Less rain
- Plenty of daylight hours
Disadvantages:
- Heat
- Bugs
- Crowded trails
- Possibility of afternoon thunderstorms
Advantages:
- Warm days/cool nights
- Fall colors
- Campfires
Disadvantages:
- Heavier pack (packing for two temperatures)
- Crowds
- Shorter days
Explore Your World – Unforgettable Hiking Vacations
3. Developing Trip Itinerary and Acquiring Permits
Depending on where you hike, there is a good possibility that you will need a permit from the local ranger station. To acquire a permit, the following information is often needed:
- Start date
- End date
- Where you are planning to camp each night
- An emergency plan often required
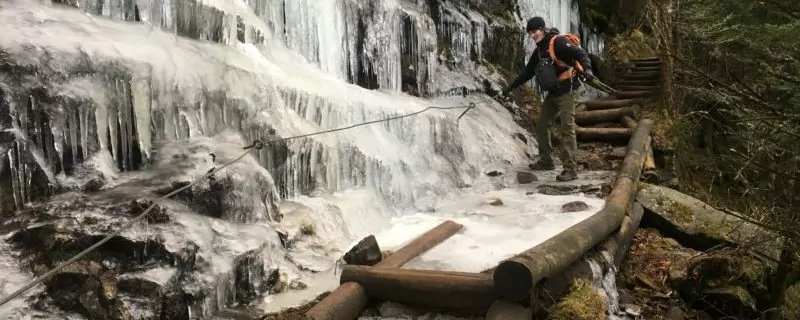
4. Emergency Exit Plan
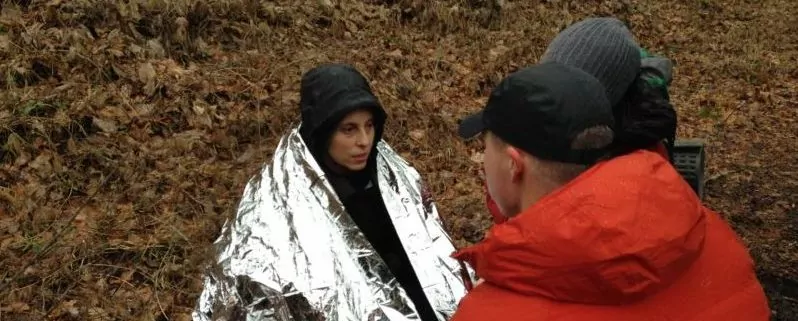
Unfortunately, emergencies in the wilderness do happen. Preparation is the key to quick and effective evacuations.
While studying your trail maps and developing your itinerary, make note of the quickest routes to a fire road or highway along your path. Keep this list in your first aid kit. In the event of an emergency, you will be able to grab your list and quickly determine your fastest exit.
Another step in emergency preparation is sharing your itinerary with a responsible and reliable friend or family member. This person needs to stay cool headed in emergencies.
Give your emergency contact the date and time of your return. Provide this designated person with the ranger station’s phone number where you acquired your permit. Have your emergency contact notify the ranger station if you do not return or make contact by the agreed upon date and time.
After making your emergency plan, replenish your first aid kit or put together a first aid kit if you don’t have one.
If you have time, consider taking a Wilderness First Aid class and Wilderness Survival Skills Level 1 class. These classes teach you how to remain calm, think outside “the box”, and be successful in emergencies when your resources are limited.
5. Shuttles

Don’t get stranded!
Plan out how you are getting to the trail head and how you are getting home. Is a friend picking you up upon completion of your hike? Are you hiring a shuttle driver? Or are you setting your own shuttle by leaving a car at each end of the trail? I am leaving a vehicle at both ends of the trail on my upcoming hike.
One easy way to find a shuttle driver is by contacting a local outfitter store in the trail’s area. Shuttles vary in price. Some are free, but tips are expected. Some are a set rate based on mileage. Others charge a per person rate. Do call multiple shuttle drivers to compare rates. Do not hesitate to negotiate rates, and please do tip your shuttle driver – especially if driver is on time, make extra stops, and have a clean vehicle.

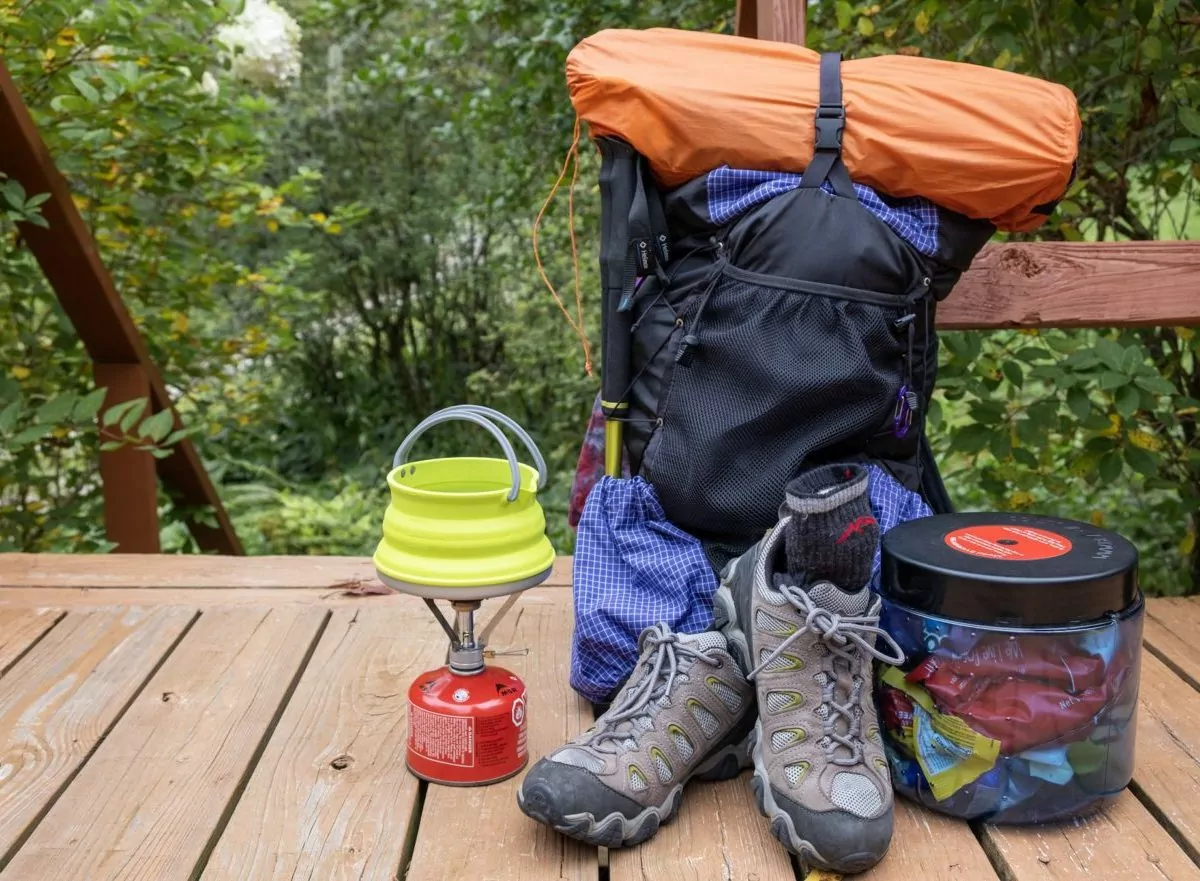
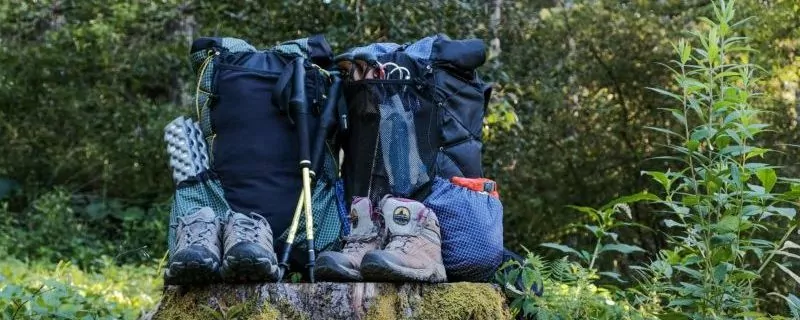
6. Gathering Gear
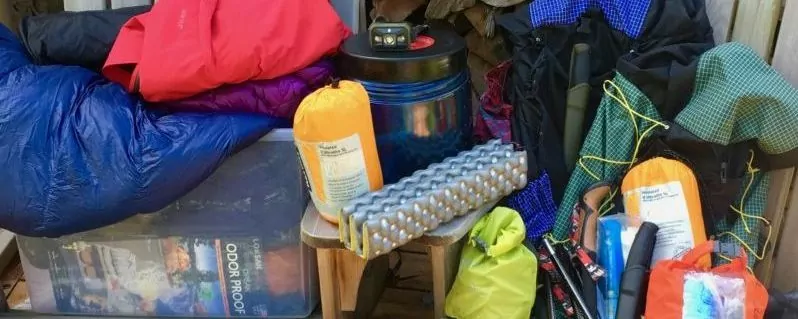
Gather all of your gear in one area. Sort into categories. Make a list of your needs. Decide what you want to take.
Your list may look like the following:
- The “Big Three”
- Backpack with pack liner, contractor trash bag, or pack cover
- Tent or tarp tent with ground cloth (unless staying in shelters or huts)
- Sleep system: sleeping bag or quilt, sleeping pad, and optional pillow
- Navigation
- Map
- Compass
- Cellphone with navigation app (optional)
- GPS (optional)
- Personal location device (optional)
- Cooking System
- Stove (unless cold soaking)
- Fuel (unless cold soaking)
- Lighter, ignitor, or waterproof matches (unless not bringing a stove)
- Mug and/or pot
- Long handled spoon or spork
- Small sponge
- Paper towels in a ziplock bag (for wiping out pot before washing)
- Large ziplocks for trash
- Environmentally friendly unscented soap
- Bear Canister or Bear Bag Food Hanging System
- Water Purification System
- Filter system
- Purification drops or tablets (back up if filter fails)
- Water bottle or bladder that works with your filtration system
- Toiletries
- Hand sanitizer
- Toothpaste
- Small toothbrush
- Dental floss (can also use as thread for repairs)
- Pre-moistened wipes (for nightly wipe-off)
- 4 sheets toilet paper per person/per day
- Menstruation products with empty ziplock for waste
- Trowel
- Women’s Pee Rag
- Prescription medications
- First Aid Kit
- Hiking Clothes/Gear
- Camp Clothes/Gear
- Headlamp
- Long underwear top
- Long underwear bottom
- Wool or synthetic warm sleep socks
- Puffy jacket (down or synthetic)
- Camp shoes (optional)
- Miscellaneous
- Extra headlamp batteries
- Sunscreen (if needed)
- Lip balm (if needed)
- Sunglasses (if needed)
- Bug net (optional)
- Gaiters (optional)
- Ice traction devices (if needed)
- Ice axe (if needed)
- Waterproof matches, lighter, or striker
- Small amount of cash
- Credit card
- ID
- Keys (to your car)
- Duct tape
- Needle
- Air mattress patches (if needed)
- Portable charger and charging cord (optional)
- Journal and pen (optional)
- Camera (optional)
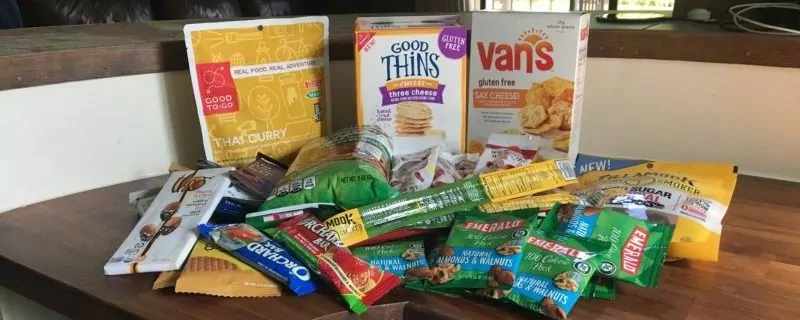
7. Food Planning

To cook or to boil? You decide. When I was interviewing for my position as a backpacking guide, one of my questions regarded my skills in a backcountry backpacking camp kitchen. I replied that I am excellent at boiling water.
Food planning is serious business. I keep reminding myself that we can last approximately three weeks without food. So if I do run out of food, I may be hungry, but I will live.
There are many ways to eat in the backcountry. You can carry a heavier pack and make fresh meals like pesto pasta with chicken, white beans, and cherry tomatoes. Another option is cook at home. Dehydrate these meals and vacuum pack them for homemade meals on the trail. Or you can by pre-packaged backpacking meals that require only adding boiling water. And, yes, the boiling method is what I am doing for my up coming hike because I want to keep my pack as light as possible.
If you are interested in cooking and not just boiling water at you campsite, check out Wildland Trekking’s article on Back Country Cooking. A sample menu is outlined as well as ideas for your backpacking cook kit.
Backpacking requires a lot of energy and calories. One method to estimate needed calories is to plan to consume 3000 calories per day. If you’d like a more precise number, multiply your body weight in pounds by 13.5 and then by 15 for a range of calories used per day.
My method doesn’t require calorie counting. I plan how, what, and when I eat based on my daily mileage. Most hikers hike an average of 2 miles per hour. I plan on eating every hour. An example of my typical eating plan on 13.1 mile day is as follows:
- Eat a calorie dense breakfast at camp.
- Hike an hour (approximately 2 miles); eat a snack.
- Hike another hour; eat a snack (approximately 4 miles completed).
- Hike another hour; eat lunch (approximately 6 miles completed).
- Hike an hour; have snack time (approximately 8 miles completed).
- Hike another hour; eat another snack (approximately 10 miles completed).
- Hike an hour; consume last snack for today (approximately 12 miles completed).
- Hike the last bit of mileage; eat dinner at camp.
- Eat dessert before bed.
On that day, I will need to have easy access to lunch plus 5 snacks.
I plan out each day in this manner. Then I add up the total of all of my breakfasts, lunches, dinners, and snacks that I will need and make a shopping list.
Part of meal planning is deciding if you are going to carry all of your food for the week or schedule a few food drops. A food drop is where you have friends, family, or hired companies meet you at designated intersections where the trail crosses the road. These people will bring you fresh supplies, including food. I will have two food drops during my hike. Again, this lowers my pack weight significantly and allows me some fresh fruits and veggies along my trek.
8. Shopping

Let the spending begin!
By now you have made two lists: gear needs and food requirements. It is always a good idea to support local businesses, so take these lists and head to your local outfitters store and grocery store. Be sure to cross off the items on your list as you fill your buggy with backpacking goodies.
Once home again, your computer and postal service will be your friends in completing your shopping trip. Sites like Amazon, REI, and Wildland Trekking Outfitters will aid in crossing off your needed items. However, do look at and consider purchasing from “Cottage Industry” backpacking gear companies like Enlightened Equipment, Lightheart Gear, and Zpacks. You can google “Cottage Industry Backpacking Gear Companies” for a comprehensive list and links to easily find unique backpacking gear options.
If you are ordering gear, do place your orders early in the planning process to allow plenty of time for your gear to arrive on your doorstep. No one wants to experience panic when departure day arrives and gear has not.
9. Food Prep
The goals of food prepping are organizing and saving space.
Ziplock bags are your friends. You will be dividing up and portioning servings into ziplock bags. Then squeeze as much air out of them as possible. Use freezer bags as they can handle hot, even boiling, water. Buy good quality ziplock bags. This is not an item to try and save a few pennies on.
Sort food (breakfast, lunch, dinner, and snacks) into a gallon ziplock for each day. This will save time finding your food. The ziplock turns into a trash bag as the meals are eaten. Remember, trash also needs to be hung or stored in your bear canister. The ziplock bag helps keep rotting food odors under control.
If you are dehydrating your own food and making homemade backpacking meals, start preparing these meals early in your planning process. This will allow time to accommodate kitchen failures without causing an anxiety attack.
10. Packing
Mentally divide your pack into three sections: bottom, middle, and top.
Bottom: soft, squishy items
- Sleeping bag/quilt
- Inflatable air mattresses (foam sleep pads will strap on outside)
- Camp clothes
- Camp shoes
- ID, credit card, money, keys (in a ziplock)
Middle: heavy items
- Bear canister/food bag
- Cooking system (keep fuel upright and separate from food)
- Tent
- Hydration bladder
Top: items needed during hike
- Rain gear
- Puffy jacket
- Water purification system
- Toilet supplies (TP, empty ziplock for used TP, and trowel)
- First Aid Kit (at the very top!)
Outside pockets:
- Water Bottles
- Headlamp
- Snacks
- Map/compass
- Pack cover (if using)
Enthusiastically accept all invitations to go on a one week thru hike without worry or stress. Simply follow the steps outlined above. Your itinerary will be set, your backpack will be packed, and the fear of leaving something behind will never cross your mind. Leave for your one week thru hike with a happy heart and peaceful mind.
However, if you still find planning a week one week thru hike overwhelming; never fear, simply check out Wildland Trekking and choose the guided backpacking trip of your dreams. Wildland Trekking’s guided backpacking trips are a stress-free and exciting way to explore the backcountry. The tour company handles permits, gear, transportation, meals, and all the extra little details so you can focus 100% on enjoying your adventure. Read more…
Wildland Trekking Hiking Adventures
As the world’s premier hiking and trekking company, Wildland believes in connecting people to fantastic environments in amazing ways. Wildland Trekking Company offers an array of incredible hiking and trekking experiences in 9 states and 11 countries. Read more about our world-class destinations.
To learn more about our guided backpacking trips and all of our award-winning hiking vacations, please visit our website or connect with one of our Adventure Consultants: 800-715-HIKE.

